Table of Contents
Apply LUTs in Pixelmator Pro
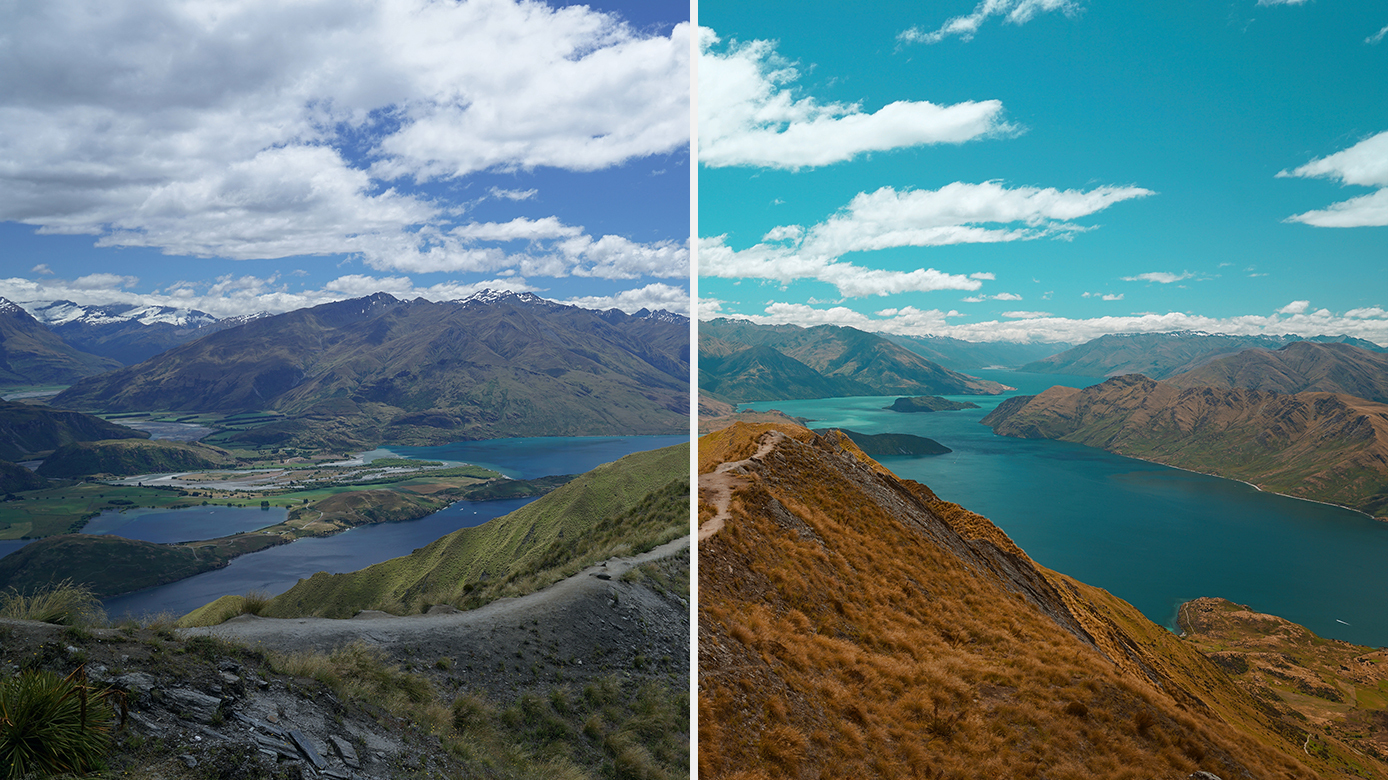
LUT (or the "lookup table") offers a means of changing, managing, and matching colors, and is commonly used in cinema and photography. LUTs are similar to the color adjustment presets in Pixelmator Pro. Both are sets of color, shadow, and contrast adjustments that combined give an image a particular look and feel. In fact, LUTs themselves can be used together with Pixelmator Pro-native color adjustments.
What's different about LUTs, is that unlike the color adjustments presets which are Pixelmator Pro-exclusive (i.e. can be created and used within the Pixelmator ecosystem only), LUTs are universal. This means that the same LUT can be used across different editing programs and different mediums. With that, all sorts of handy workflows become possible. For instance, you can use LUTs to apply a look of any image you've edited in Pixelmator Pro to a video you're working on in Final Cut Pro. See Using Pixelmator Pro to color grade video in Final Cut Pro to learn more about this workflow.
Pixelmator Pro supports LUTs in the .cube file format. If read as plain text, the .cube file will often feature a list or table of colors expressed by values ranging from 0.0 to 1.0. Pixelmator Pro can then use these lists or tables to look up exactly to which new color values the already existing values should be changed. Once that's done, the pixels featuring those colors (or their closest shades) will change in the image as well.
If you’d like to find out more about how LUTs work in Pixelmator Pro, you can check out our article An in-depth look at 3D LUTs in Pixelmator Pro.
Apply a custom LUT to an image
In Pixelmator Pro, you can choose from 5 different collections of pre-made LUTs that come with Pixelmator Pro or apply the custom LUTs you've installed yourself. Since LUTs work like any other color adjustment, they can be non-destructively applied to individual layers or layer groups and combined with other adjustments.
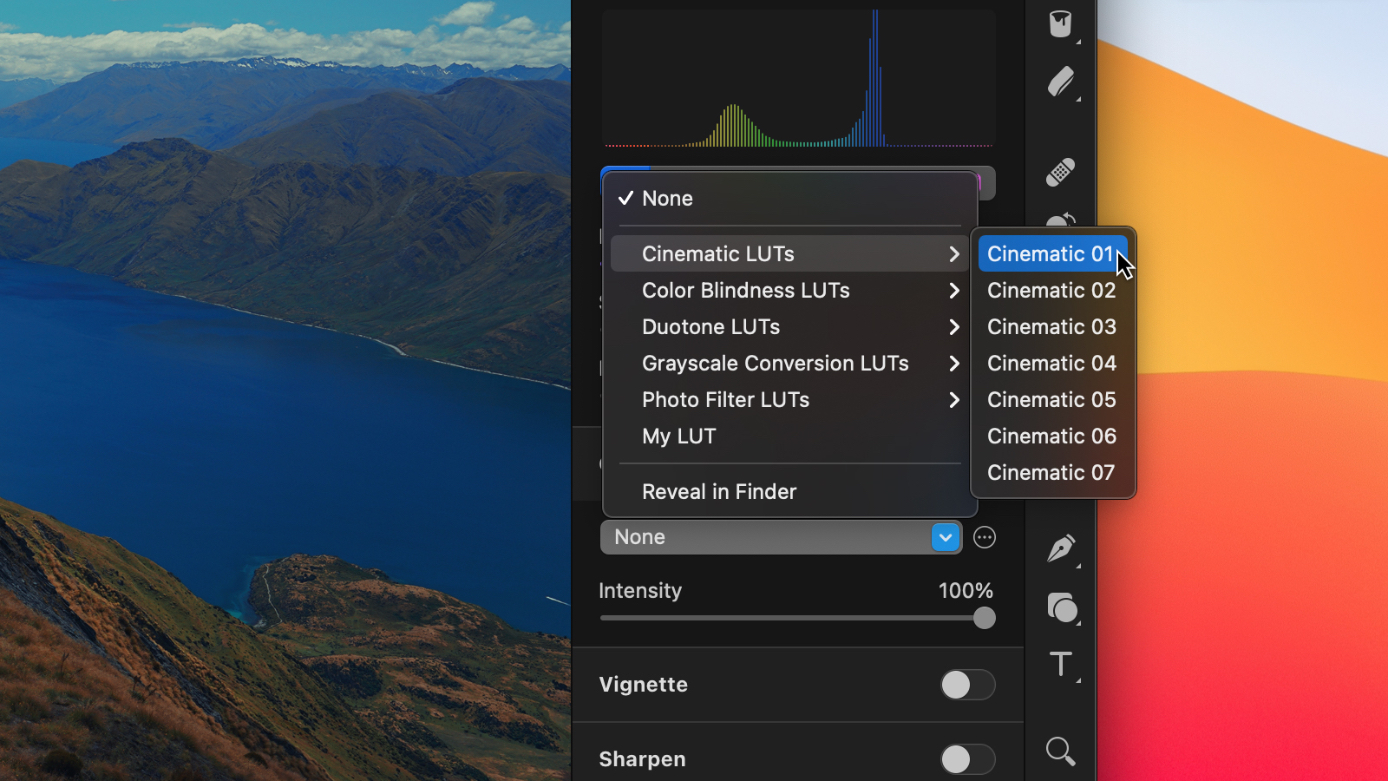
- Do one of the following:
- Choose Format > Color Adjustments > Custom LUT (from the Format menu at the top of your screen) and choose a LUT from the list.
- In the Tools sidebar, click
 and turn on Custom LUT or add it from the Customize menu at the bottom of the Color Adjustments pane. In the Custom LUT pop-up menu, choose from the available LUTs.
- (Optional) Drag the Intensity slider to control the strength of the LUT or how it blends with the other color adjustments.
Tip: You can see how LUTs will look like before applying them by hovering the pointer over the name of the LUT.
Show Original: Click the Show Original button or press + on your keyboard to see what the image looks like without any color adjustments.
To reset all Color Adjustments, click Reset at the bottom of the Color Adjustments pane.
Apply a custom LUT as a color adjustments layer
- To create a color adjustments layer, do any of the following:
- Choose Insert > Color Adjustments (from the Insert menu at the top of your screen).
- Click the Add
 at the top of the Color Adjustments pane.
 - Press + +
- In the Tools sidebar, click
and turn on Custom LUT or add it from the Customize menu at the bottom of the Color Adjustments pane.
Import a custom LUT
If you have a custom LUT you want to use in Pixelmator Pro, you can import it. The custom LUT will be saved to the Pixelmator Pro LUTs library and will always be available from the LUT collections pop-up menu.
- Do one of the following:
- Choose Format > Color Adjustments > Custom LUT (from the Format menu at the top of your screen).
- In the Tools sidebar, click
and turn on Custom LUT or add it from the Customize menu at the bottom of the Color Adjustments pane.
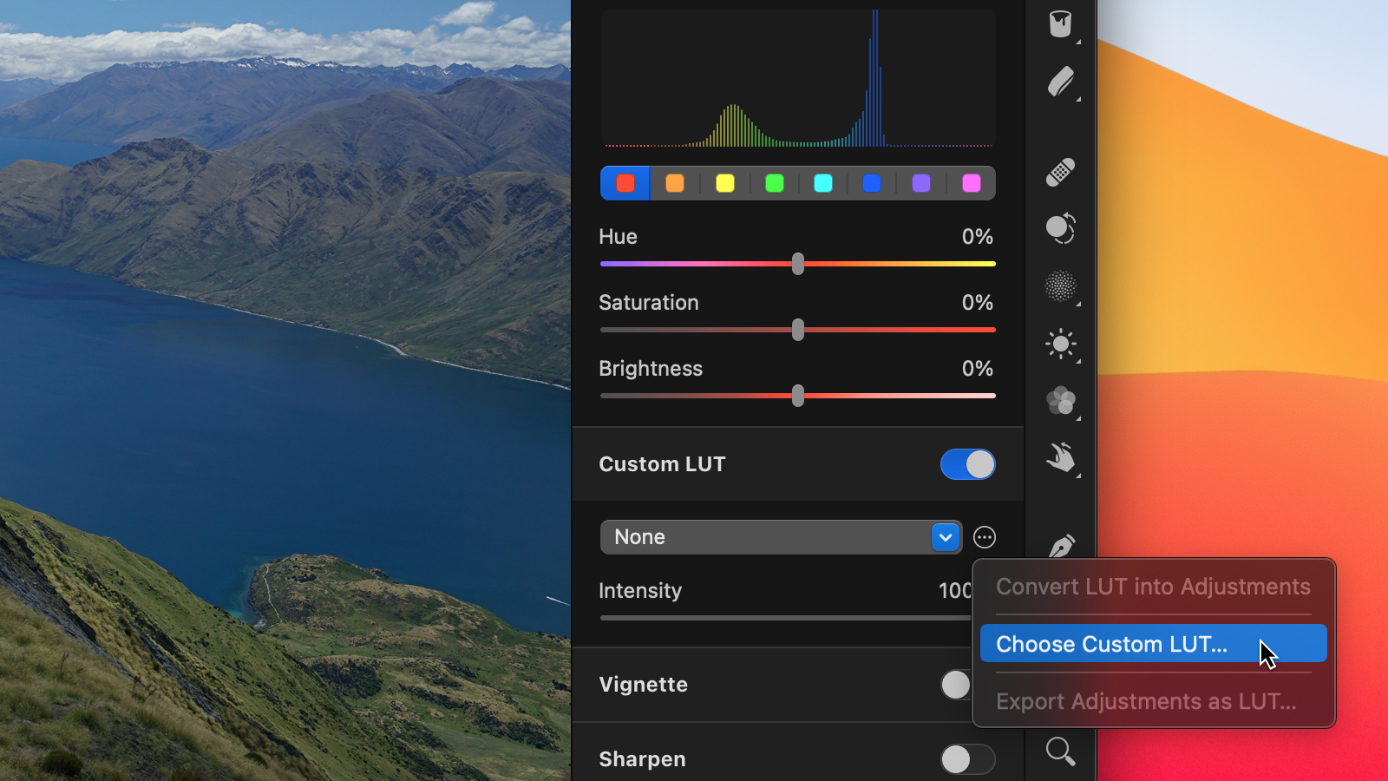
- In the More menu
 , click Choose Custom LUT. Use the documents browser to locate the LUT file on your Mac.
 - Double-click the LUT file or click Choose to import.
Note: Pixelmator Pro supports 1D and 3D LUTs in the .cube file format.
Convert LUT into Pixelmator Pro color adjustments
Sometimes, you may want to additionally adjust the LUTs or save them as color adjustment presets. You can do so by converting the LUT files into Pixelmator Pro color adjustments.
- Do one of the following:
- Choose Format > Color Adjustments > Custom LUT (from the Format menu at the top of your screen).
- In the Tools sidebar, click
and turn on Custom LUT or add it from the Customize menu at the bottom of the Color Adjustments pane.
- In the More menu , click Convert LUT into Adjustments.
Save Pixelmator Pro color adjustments as LUTs
If you have a set of color adjustments you'd like to use in apps other than Pixelmator Pro, you can save them as LUTs.
- Apply the color adjustments you want to your image or select one of the color adjustment presets.
- Do one of the following:
- Choose Format > Color Adjustments > Export Adjustments as LUT (from the Format menu at the top of your screen).
- Click the More menu next to the ML Enhance button and choose Export Adjustments as LUT.
- In the Tools sidebar, click
and turn on Custom LUT or add it from the Customize menu at the bottom of the Color Adjustments pane. In the More menu , click Export Adjustments as LUT.
Reset custom LUTs
If you'd like to roll back the LUTs library to how it originally comes with Pixelmator Pro, you can reset it.
- Do one of the following:
- Choose Format > Color Adjustments > Custom LUT (from the Format menu at the top of your screen).
- In the Tools sidebar, click
and turn on Custom LUT or add it from the Customize menu at the bottom of the Color Adjustments pane.
- In the More menu , press and hold the key and click Reset Custom LUTs.
IMPORTANT: After the reset, any custom LUTs will also be deleted from the "Custom LUTs" folder on your Mac.
Manage your custom LUTs
LUTs are managed outside Pixelmator Pro, in a dedicated "Custom LUTs" folder on your Mac. Here, you can add and name folders to create new LUT collections that will appear in Pixelmator Pro.
- Do one of the following:
- Choose Format > Color Adjustments > Custom LUT (from the Format menu at the top of your screen).
- In the Tools sidebar, click
and turn on Custom LUT or add it from the Customize menu at the bottom of the Color Adjustments pane.
- Click the Custom LUT pop-up menu and choose Reveal in Finder.


