Table of Contents
Apply tile effects
The effects in the Tile category repeatedly tile the selected layer in artistic or geometrical patterns.
Repeatedly tile an image
Tile effects can be applied directly to a single layer or, using an effects layer, to multiple layers in a composition.
To tile the currently selected layer, do one of the following:
- Choose Format > Effects > Tile (from the Format menu at the top of your screen) and choose the Tile effect you want.
- Click
 in the
Tools sidebar, then click Add Effect and add the Tile effect you want.
in the
Tools sidebar, then click Add Effect and add the Tile effect you want. - Press on your keyboard, click Add Effect and add the Tile effect you want.
To sharpen multiple layers in a composition using an effects layer (all layers below this layer will be affected):
- Choose Insert > Effects (from the Insert menu at the top of your screen), click Add Effect in the Tool Options pane and add the Tile effect you want.
- Click
 at the top of the
Layers sidebar, choose Effects, click Add Effect in the Tool Options pane and add the Tile effect you want.
at the top of the
Layers sidebar, choose Effects, click Add Effect in the Tool Options pane and add the Tile effect you want. - Press + + on your keyboard, click Add Effect in the Tool Options pane and add the Tile effect you want.
Apply a Kaleidoscope effect
The Kaleidoscope effect symmetrically reflects your image to create a kaleidoscopic pattern.
Customize the effect:
Move the Count slider to change the number of reflections. You can also enter a value from 1 to 64.
Move the Angle wheel to change the angle of the reflections. You can also enter a value from 0.0º to 359.9º.
Move the handle of the effect rope to choose the center of the kaleidoscope pattern. If the effect rope isn’t visible, click the rope button in the Tool Options pane.

Show Original: Click the Show Original button or press + on your keyboard to see what the image looks like without any effects.
Show Split Comparison: – click the Show Original button, press + on your keyboard, or force click the canvas.
To reset all effects, click Reset at the bottom of the Tool Options pane.
To preserve layer transparency when applying the Kaleidoscope effect, click the effect name in the Tool Options pane and choose Preserve Transparency.
Apply a Triangle Kaleidoscope effect
The Triangle Kaleidoscope effect symmetrically reflects your image to create a kaleidoscopic pattern composed of triangular segments.
Customize the effect:
Move the Size slider to change the size and the number of reflections. You can also enter a value from 0.0 px to 1000.0 px.
Move the Decay slider to the left to darken any triangles further away from the original triangle or to the right to reduce the darkening effect.
Move the Rotation wheel to change the angle of the reflections. You can also enter a value from 0.0º to 359.9º.
Move the handle of the effect rope to choose the center of the kaleidoscope pattern. If the effect rope isn’t visible, click the rope button in the Tool Options pane.
Show Original: Click the Show Original button or press + on your keyboard to see what the image looks like without any effects.
Show Split Comparison: – click the Show Original button, press + on your keyboard, or force click the canvas.
To reset all effects, click Reset at the bottom of the Tool Options pane.
To preserve layer transparency when applying the Triangle Kaleidoscope effect, click the effect name in the Tool Options pane and choose Preserve Transparency.
Apply a Snowflake effect
The Snowflake effect produces a tiled image from a source image by applying eight-way reflected symmetry.
Customize the effect:
Move the Angle wheel to change the angle of the snowflakes. You can also enter a value from 0.0º to 359.9º.
Move the Width slider to adjust the size of the snowflakes. You can also enter a value from 0.0 px to 200.0 px.
Move the effect handle to adjust the position of the effect. If the effect rope isn’t visible, click the rope button in the Tool Options pane.
Show Original: Click the Show Original button or press + on your keyboard to see what the image looks like without any effects.
Show Split Comparison: – click the Show Original button, press + on your keyboard, or force click the canvas.
To reset all effects, click Reset at the bottom of the Tool Options pane.
To preserve layer transparency when applying the Snowflake effect, click the effect name in the Tool Options pane and choose Preserve Transparency.
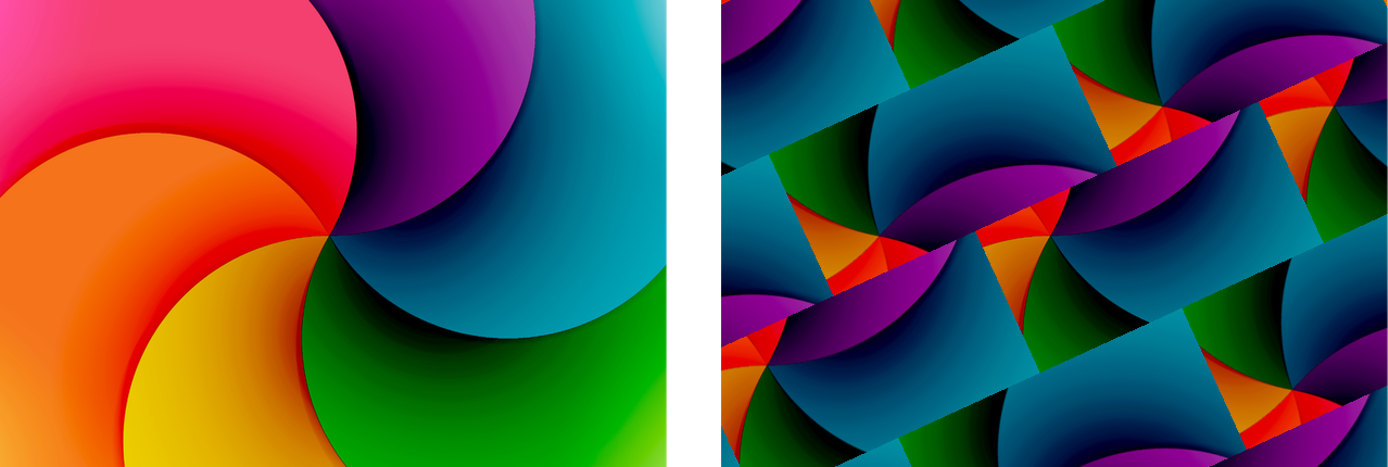
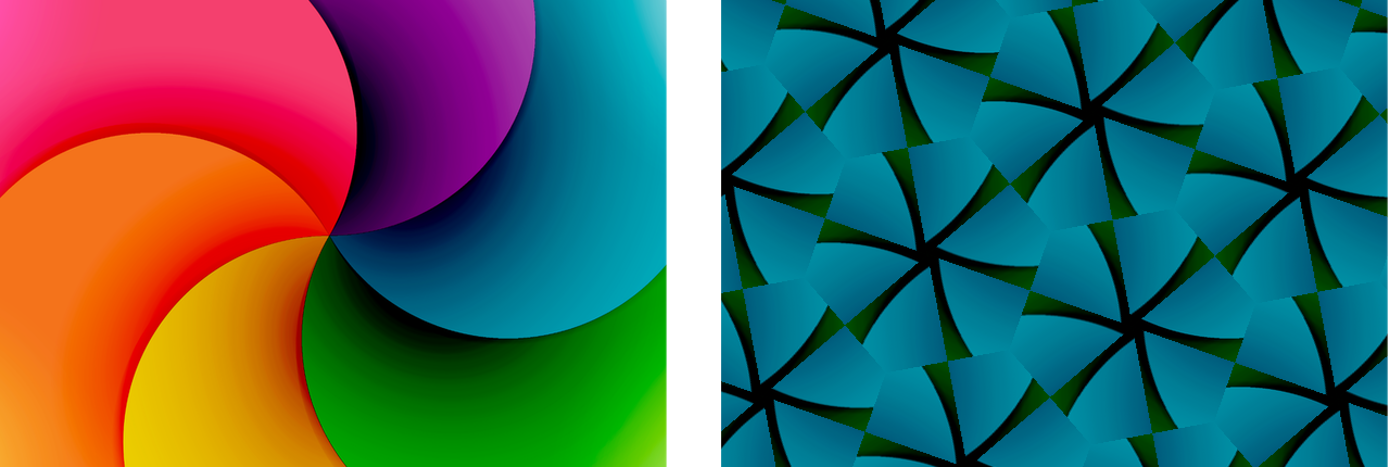
Apply a Tessera effect
The Tessera effect produces a tiled image by reflecting it in a parallelogram and angling individual segments.
Customize the effect:
Move the Angle wheel to adjust the angle of the tiles in the pattern. You can also enter a value from 0.0º to 359.9º.
Move the Width slider to adjust the size of the segments that make up the Tessera effect. You can also enter a value from 0.0 px to 200.0 px.
Move the Acute Angle wheel to adjust the shape of the tiles — small values create thin, diamond-shaped tiles, while large values create thicker tiles. You can also enter a value from 0.0º to 359.9º.
Move the effect handle to adjust the position of the effect. If the effect rope isn’t visible, click the rope button in the Tool Options pane.
Show Original: Click the Show Original button or press + on your keyboard to see what the image looks like without any effects.
Show Split Comparison: – click the Show Original button, press + on your keyboard, or force click the canvas.
To reset all effects, click Reset at the bottom of the Tool Options pane.
To preserve layer transparency when applying the Tessera effect, click the effect name in the Tool Options pane and choose Preserve Transparency.
Apply a Pinwheel effect
The Pinwheel effect rotates the source image at increments of 90° to create a pinwheel-like pattern.
Customize the effect:
Move the Angle wheel to adjust the angle of the tiles in the pattern. You can also enter a value from 0.0º to 359.9º.
Move the Width slider to adjust the size of the individual segments that make up the Pinwheel effect. You can also enter a value from 0.0 px to 200.0 px.
Move the effect handle to adjust the position of the effect. If the effect rope isn’t visible, click the rope button in the Tool Options pane.
Show Original: Click the Show Original button or press + on your keyboard to see what the image looks like without any effects.
Show Split Comparison: – click the Show Original button, press + on your keyboard, or force click the canvas.
To reset all effects, click Reset at the bottom of the Tool Options pane.
To preserve layer transparency when applying the Pinwheel effect, click the effect name in the Tool Options pane and choose Preserve Transparency.
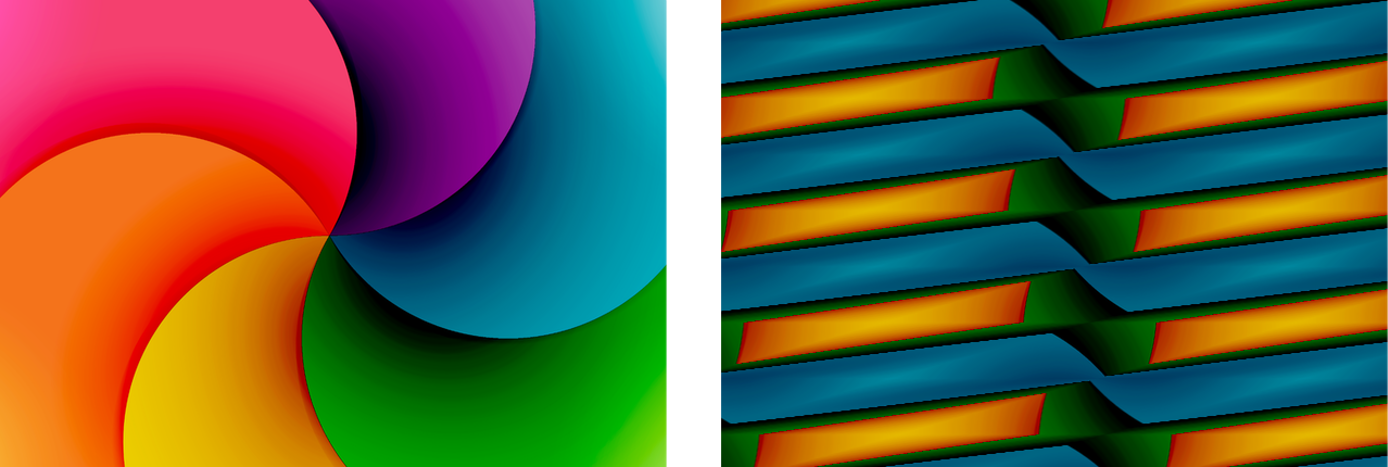
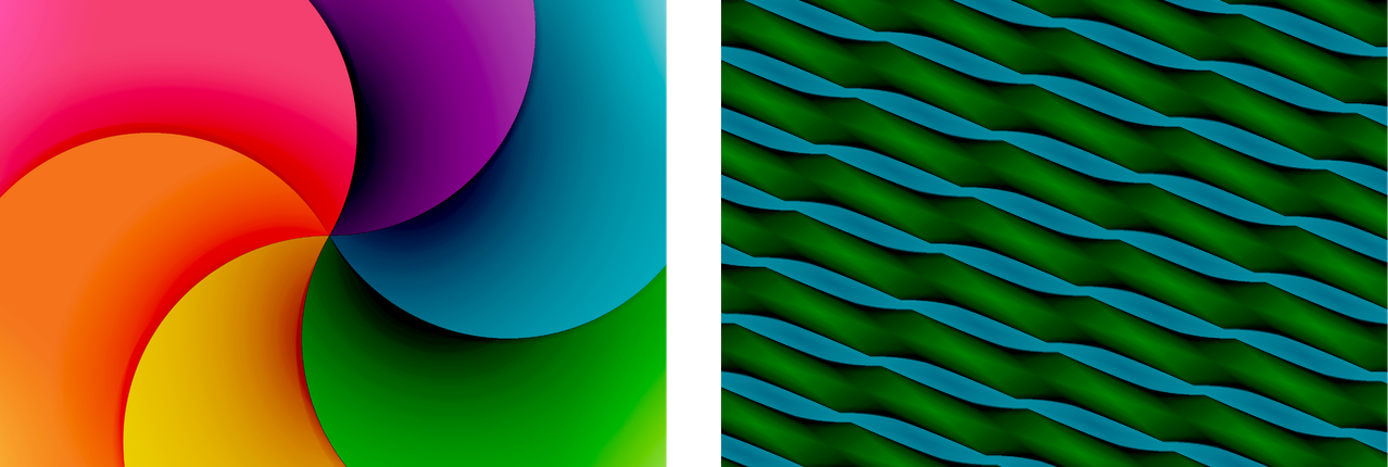
Apply a Shutters effect
The Shutters effect produces a tiled image from a source image by applying four translation operations.
Customize the effect:
Move the Angle wheel to adjust the angle of the tiles in the pattern. You can also enter a value from 0.0º to 359.9º.
Move the Width slider to adjust the size of the individual segments that make up the Shutters effect. You can also enter a value from 0.0 px to 200.0 px.
Move the Acute Angle wheel to change the angle of the effect tiles. You can also enter a value from 0.0º to 359.9º.
Move the effect handle to adjust the position of the effect. If the effect rope isn’t visible, click the rope button in the Tool Options pane.

Show Original: Click the Show Original button or press + on your keyboard to see what the image looks like without any effects.
Show Split Comparison: – click the Show Original button, press + on your keyboard, or force click the canvas.
To reset all effects, click Reset at the bottom of the Tool Options pane.
To preserve layer transparency when applying the Shutters effect, click the effect name in the Tool Options pane and choose Preserve Transparency.
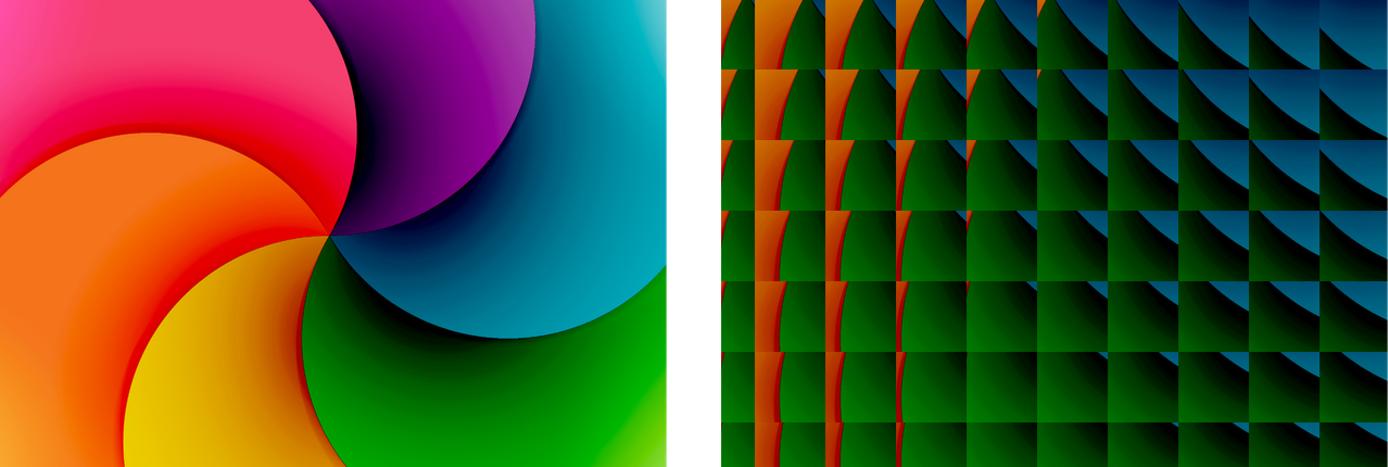
Apply a Brickwork effect
The Brickwork effect produces a tiled image from a source image in the style of a brick wall.
Customize the effect:
Move the Angle wheel to adjust the angle of the brick tiles in the pattern. You can also enter a value from 0.0º to 359.9º.
Move the Width slider to adjust the size of the tiles in the pattern. You can also enter a value from 0.0 px to 200.0 px.
Move the effect handle to adjust the position of the effect. If the effect rope isn’t visible, click the rope button in the Tool Options pane.
Show Original: Click the Show Original button or press + on your keyboard to see what the image looks like without any effects.
Show Split Comparison: – click the Show Original button, press + on your keyboard, or force click the canvas.
To reset all effects, click Reset at the bottom of the Tool Options pane.
To preserve layer transparency when applying the Brickwork effect, click the effect name in the Tool Options pane and choose Preserve Transparency.
Apply an Op effect
The Op tile effect segments an image and transforms each segment, then assembles them to create an effect in the style of optical art.
Customize the effect:
Move the Scale slider to adjust the size of the image resulting from the Op effect. You can also enter a value from 10% to 1000%.
Move the Angle wheel to rotate the result of the Op effect. You can also enter a value from 0.0º to 359.9º.
Move the Width slider to adjust the size of the individual segments that make up the Op effect.
Move the effect handle to adjust the position of the effect. If the effect rope isn’t visible, click the rope button in the Tool Options pane.
Show Original: Click the Show Original button or press + on your keyboard to see what the image looks like without any effects.
Show Split Comparison: – click the Show Original button, press + on your keyboard, or force click the canvas.
To reset all effects, click Reset at the bottom of the Tool Options pane.
To preserve layer transparency when applying the Op effect, click the effect name in the Tool Options pane and choose Preserve Transparency.
Apply a Funhouse effect
The Funhouse effect warps an image by reflecting it in a parallelogram, and then tiles the result.
Customize the effect:
Move the Angle wheel to rotate the result of the Funhouse effect. You can also enter a value from 0.0º to 359.9º.
Move the Acute Angle wheel to change the angle of the effect tiles. You can also enter a value from 0.0º to 359.9º.
Move the Width slider to adjust the size of the individual segments that make up the Funhouse effect. You can also enter a value from 0.0 px to 200.0 px.
Move the effect handle to adjust the position of the effect. If the effect rope isn’t visible, click the rope button in the Tool Options pane.
Show Original: Click the Show Original button or press + on your keyboard to see what the image looks like without any effects.
Show Split Comparison: – click the Show Original button, press + on your keyboard, or force click the canvas.
To reset all effects, click Reset at the bottom of the Tool Options pane.
To preserve layer transparency when applying the Funhouse effect, click the effect name in the Tool Options pane and choose Preserve Transparency.
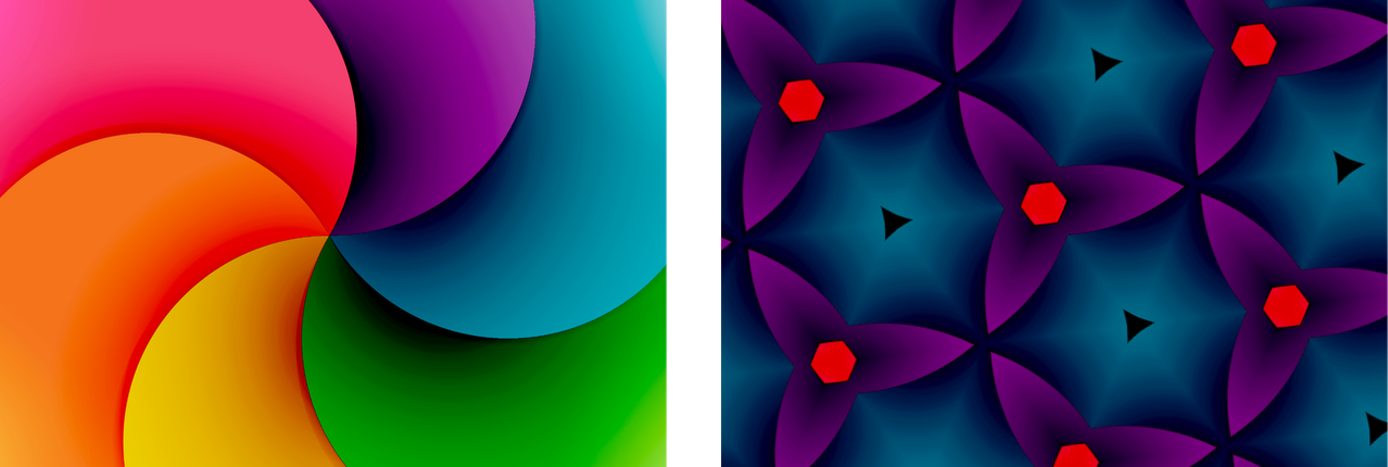
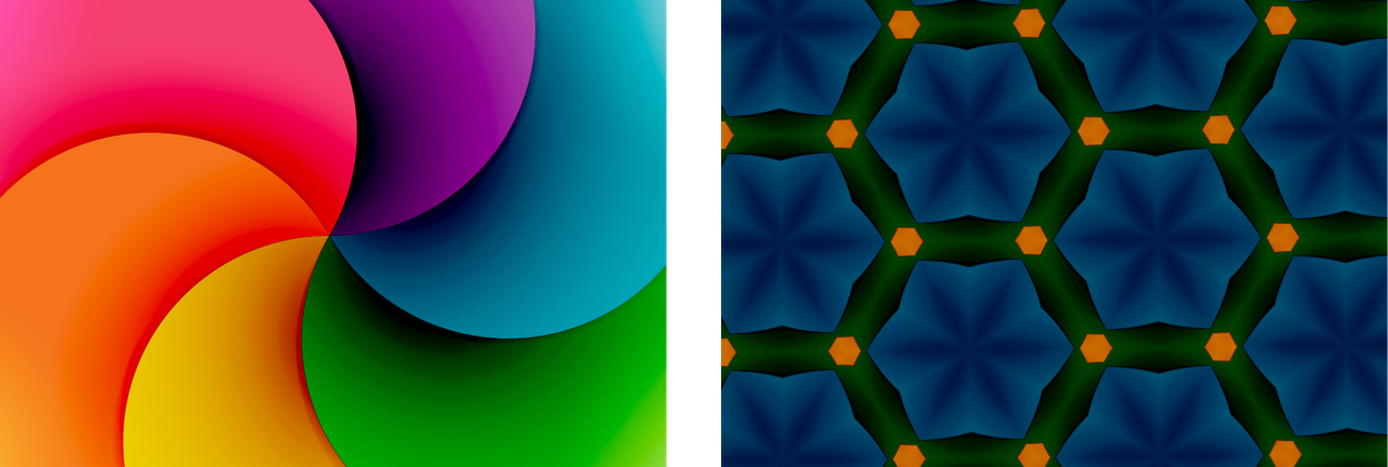
Apply a Lattice effect
The Lattice effect sections an image into hexagon fragments each reflecting the image to create a mosaic look.
Customize the effect:
Move the Angle wheel to rotate the result of the Lattice effect. You can also enter a value from 0.0º to 359.9º.
Move the Width slider to adjust the size of the individual segments that make up the Lattice effect. You can also enter a value from 0.0 px to 200.0 px.
Move the effect handle to adjust the position of the effect. If the effect rope isn’t visible, click the rope button in the Tool Options pane.
Show Original: Click the Show Original button or press + on your keyboard to see what the image looks like without any effects.
Show Split Comparison: – click the Show Original button, press + on your keyboard, or force click the canvas.
To reset all effects, click Reset at the bottom of the Tool Options pane.
To preserve layer transparency when applying the Lattice effect, click the effect name in the Tool Options pane and choose Preserve Transparency.
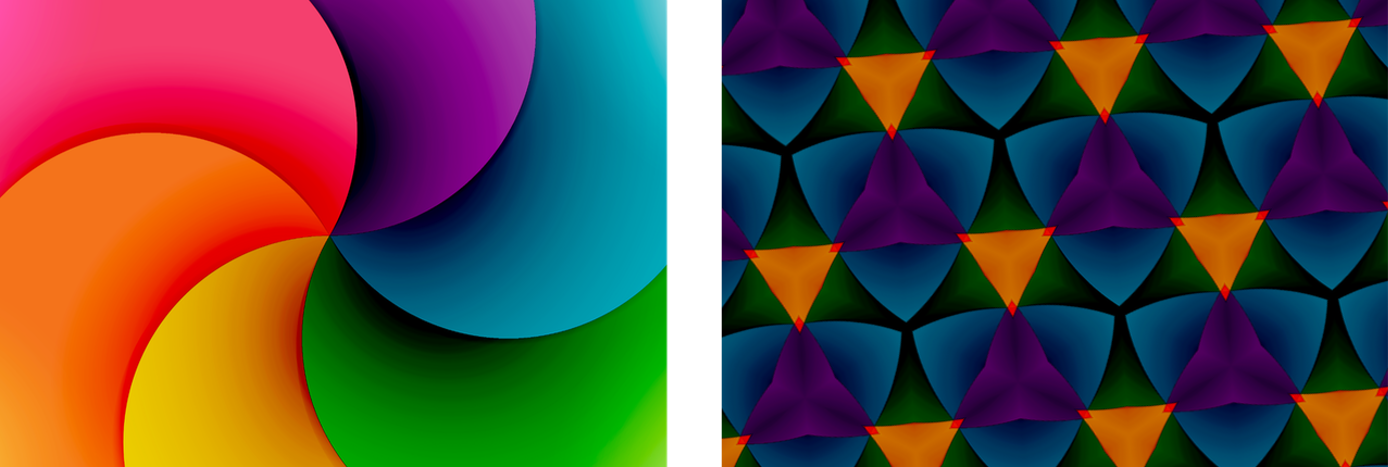
Apply a Windmill effect
The Windmill effect rotates the source image at increments of 60° which creates a pattern consisting of tiles resembling the sails of a windmill.
Customize the effect:
Move the Angle wheel to rotate the result of the Windmill effect. You can also enter a value from 0.0º to 359.9º.
Move the Width slider to adjust the size of the individual segments that make up the Windmill effect. You can also enter a value from 0.0 px to 200.0 px.
Move the effect handle to adjust the position of the effect. If the effect rope isn’t visible, click the rope button in the Tool Options pane.
Show Original: Click the Show Original button or press + on your keyboard to see what the image looks like without any effects.
Show Split Comparison: – click the Show Original button, press + on your keyboard, or force click the canvas.
To reset all effects, click Reset at the bottom of the Tool Options pane.
To preserve layer transparency when applying the Windmill effect, click the effect name in the Tool Options pane and choose Preserve Transparency.
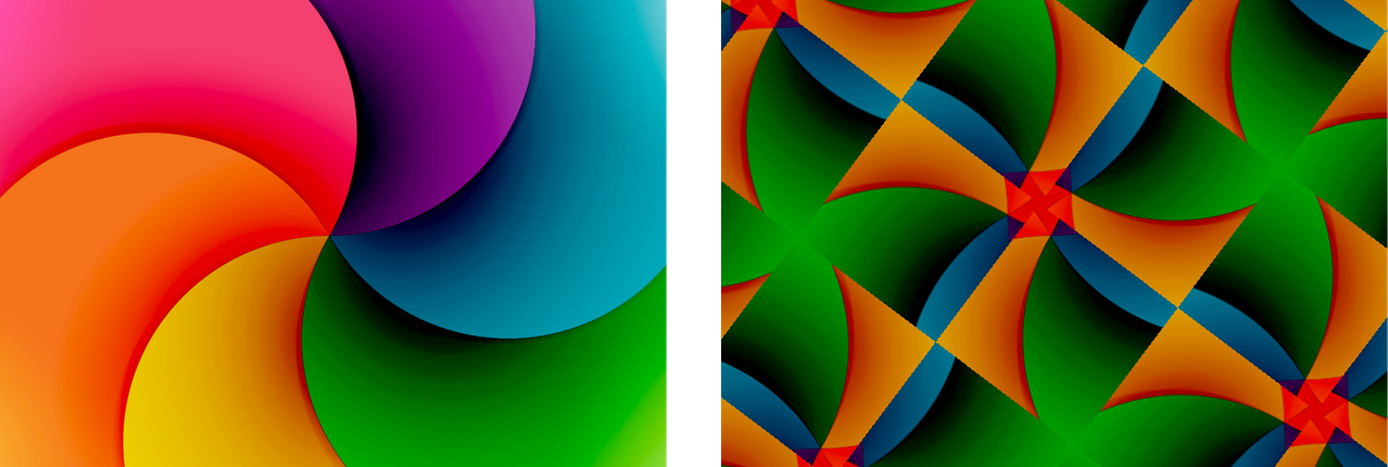
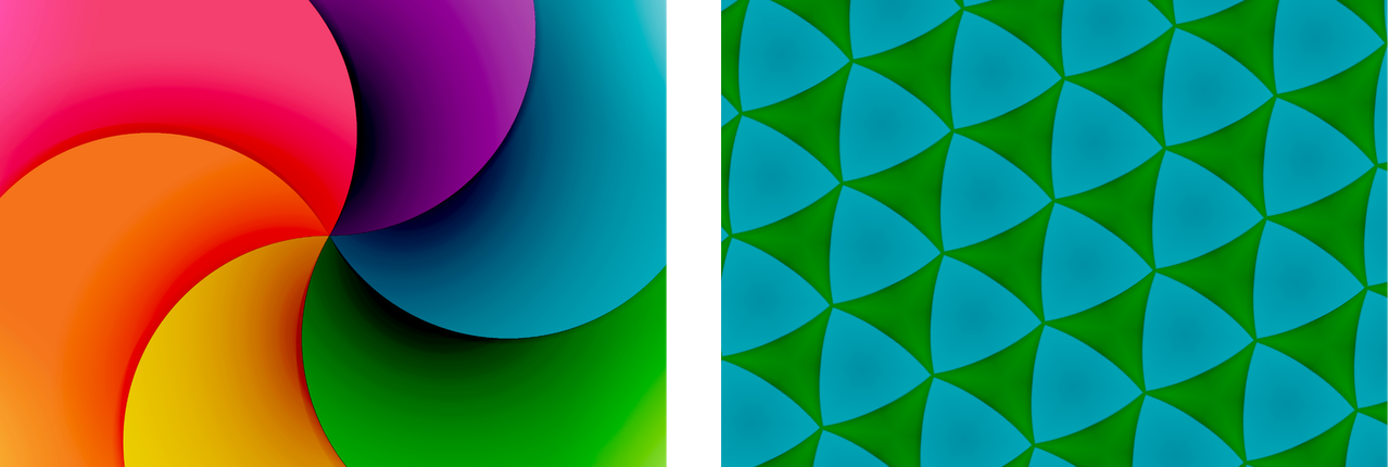
Apply a Triangle effect
The Triangle effect tiles a triangular segment of your selected layer.
Customize the effect:
Move the Size slider to adjust the size of the triangle that is tiled. You can also enter a value from 0.0 px to 1000.0 px.
Move the Rotation wheel to rotate the triangle that is tiled. You can also enter a value from 0.0º to 359.9º.
Move the Decay slider to the left to darken any triangles further away from the original triangle or to the right to reduce the darkening effect.
Move the effect handle to choose which area should be tiled. If the effect rope isn’t visible, click the rope button in the Tool Options pane.
Show Original: Click the Show Original button or press + on your keyboard to see what the image looks like without any effects.
Show Split Comparison: – click the Show Original button, press + on your keyboard, or force click the canvas.
To reset all effects, click Reset at the bottom of the Tool Options pane.
To preserve layer transparency when applying the Triangle effect, click the effect name in the Tool Options pane and choose Preserve Transparency.
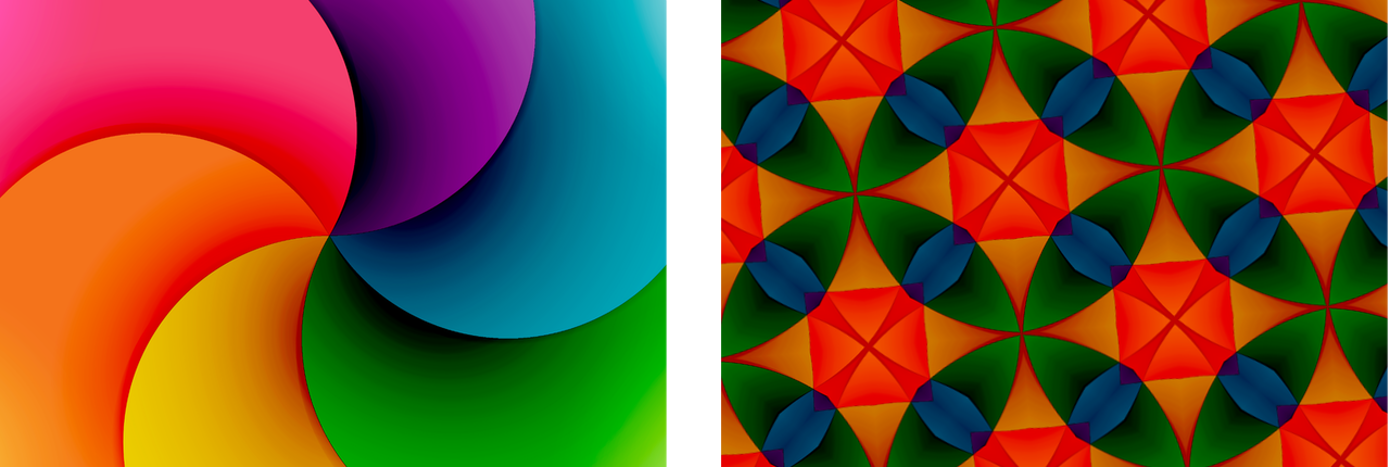
Apply a Hexagon effect
The Hexagon effect produces a tiled image from a source image by rotating the source image at increments of 30°.
Customize the effect:
Move the Angle wheel to rotate the result of the Hexagon effect. You can also enter a value from 0.0º to 359.9º.
Move the Width slider to adjust the size of the individual segments that make up the Hexagon effect. You can also enter a value from 0.0 px to 200.0 px.
Move the effect handle to adjust the position of the effect. If the effect rope isn’t visible, click the rope button in the Tool Options pane.
Show Original: Click the Show Original button or press + on your keyboard to see what the image looks like without any effects.
Show Split Comparison: – click the Show Original button, press + on your keyboard, or force click the canvas.
To reset all effects, click Reset at the bottom of the Tool Options pane.
To preserve layer transparency when applying the Hexagon effect, click the effect name in the Tool Options pane and choose Preserve Transparency.
Apply a Affine Tile effect
The Affine Tile effect lets you stretch, skew, and rotate your selected image and then tiles the result.
Customize the effect:
Move the Angle wheel to rotate the layer. You can also enter a value from 0.0º to 359.9º.
Move the Scale slider to the right to make the layer larger or to the left to make it smaller. You can also enter a value from 1% to 1000%.
Move the Stretch slider to the right to horizontally stretch the layer or to the left to shrink it.
Move the Skew slider to slate the image. You can also enter a value from -1000% to 1000%.
Move the effect handle to adjust the position of the effect. If the effect rope isn’t visible, click the rope button in the Tool Options pane.

Show Original: Click the Show Original button or press + on your keyboard to see what the image looks like without any effects.
Show Split Comparison: – click the Show Original button, press + on your keyboard, or force click the canvas.
To reset all effects, click Reset at the bottom of the Tool Options pane.
To preserve layer transparency when applying the Affine Tile effect, click the effect name in the Tool Options pane and choose Preserve Transparency.
Apply a Perspective Tile effect
The Perspective Tile effect changes the perspective of your selected image and then tiles the result.
- Move each of the effect handles to adjust the perspective. If the effect rope isn’t visible, click the rope button in the Tool Options pane.

Show Original: Click the Show Original button or press + on your keyboard to see what the image looks like without any effects.
Show Split Comparison: – click the Show Original button, press + on your keyboard, or force click the canvas.
To reset all effects, click Reset at the bottom of the Tool Options pane.
To preserve layer transparency when applying the Perspective Tile effect, click the effect name in the Tool Options pane and choose Preserve Transparency.