Table of Contents
Set editing settings
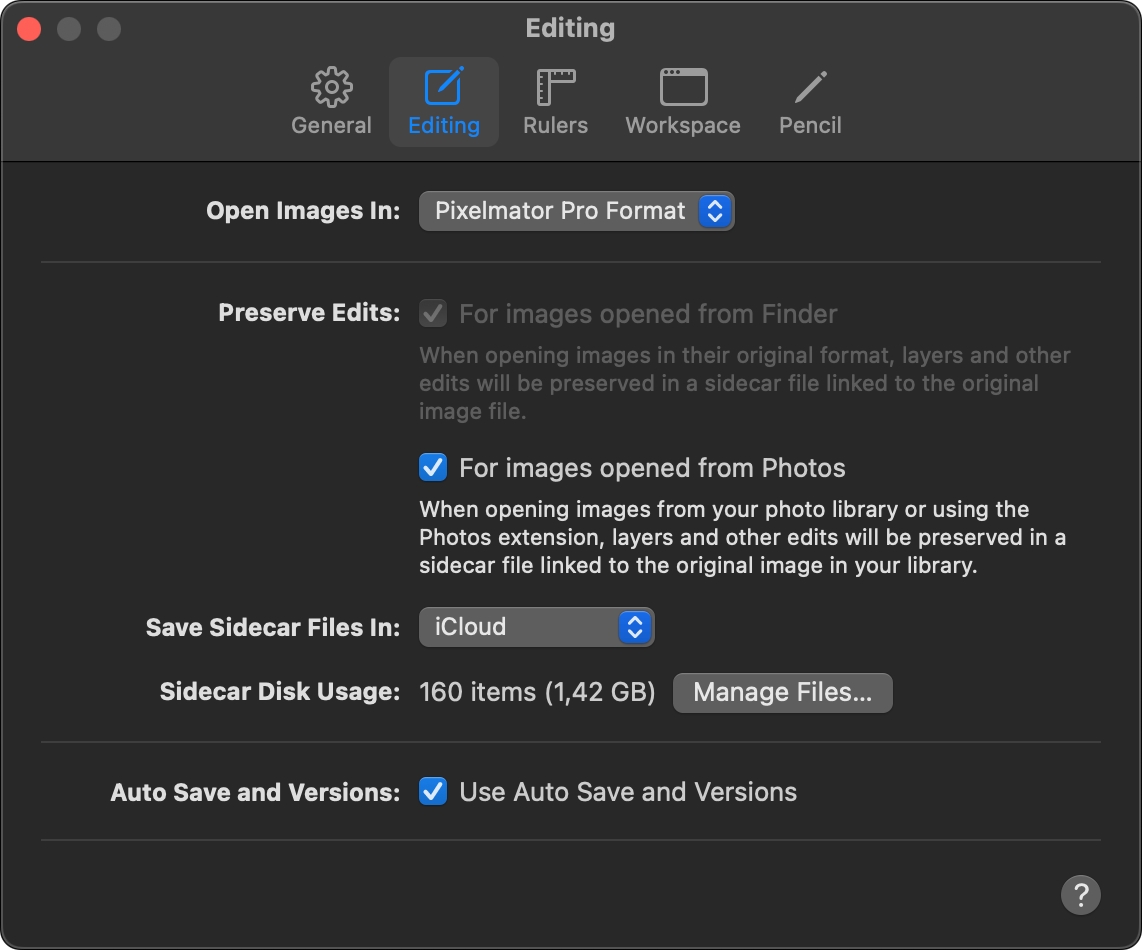
In the Editing tab, you can choose how Pixelmator Pro opens images and how edits applied to images are saved. In other words, you can choose the primary workflow you'll use when editing images. You can also quickly manage Pixelmator Pro sidecar files and Auto Save and macOS Versions on and off.
Destructive and nondestructive editing workflows
To understand which settings will work best for your particular image editing style, it's important to first understand how nondestructive and destructive workflows work. Let's break down each of the workflows below.
Nondestructive editing
Editing images nondestructively lets you save any layers, color adjustments, and other edits applied to an image and continue working on it across multiple editing sessions. By default, Pixelmator Pro imports images in its native PXD file format, creating a project file where it stores a copy of the image and all its edits. Alternatively, you can open images in their original file format, saving changes to a dedicated sidecar file instead. The sidecar files are marked by a special .pxd-sidecar extension and are linked to the photos.
Images edited nondestructively can be reverted to the original using macOS Versions. To turn on macOS Versions, make sure the Use Auto Save and Version option is selected in the Editing settings.
Note: When sharing images with sidecar edits, they are shared just like regular image files — with all the edits baked in. Saving edits to sidecar is recommended for those who often share images with others or post them on the web, but also need to keep the project file editable.
Destructive editing
While Pixelmator Pro is a nondestructive image editor by nature, you can also set it up to work with images destructively. When editing destructively, images get overwritten with the changes you make, which means that layers, color adjustments, effects, and other nondestructive edits become flattened once the image is saved and closed. Images edited destructively can only be reverted to the original if they have been opened from Photos.
Important: To prevent potential data loss, it is recommended to use destructive editing only when absolutely necessary for a specific workflow. When editing destructively, it's also recommended to always have Auto Save and macOS Versions turned on.
Open and save images in the original file format
- Choose Pixelmator Pro > Settings (from the Pixelmator Pro menu at the top of your screen).
- In the Editing tab, click the Open Images In pop-up menu and choose Original Format.
- Under Preserve Edits, choose how to save edits:
- Select For Images Opened from Finder to save images back to their original folder in Finder, keeping the original file format, and preserving all layers and edits. Deselect For Images Opened from Finder to overwrite original images when saving. The image cannot be reverted back to the original.
- Select For Images Opened from Photos to save photos opened from your photo library or use the Photos extension back to the photo library while preserving all layers and edits. Deselect For Images Opened from Photos to overwrite original photos in the photo library when saving.
Note: To continue editing an image saved to Photos, open it again using the Photo browser or Pixelmator Pro extension in Photos. Dragging the image from Photos to Pixelmator Pro directly, or choosing Edit with Pixelmator Pro from the contextual menu in Photos will open a flattened version of the image in Pixelmator Pro.
Open and save images in the Pixelmator Pro file format
- Choose Pixelmator Pro > Settings (from the Pixelmator Pro menu at the top of your screen).
- In the Editing tab, click the Open Images In pop-up menu and choose Pixelmator Pro format.
- Under Preserve Edits, choose how you'd like to save edits:
- Select For Images Opened from Photos to save photos opened from your photo library or using the Photos extension back to the photo library while preserving all layers and edits. To save a photo with changes, choose File > Modify Original in Photos.
- Deselect For Images Opened from Photos to overwrite original photos in the photo library when saving. The image can still be reverted to the original in Photos.
Important: If you additionally modify the photo using any of the default editing tools in Photos or using some third-party Photos extension (other than Pixelmator Pro), all the changes applied to the image using Pixelmator Pro will be overwritten.
Choose the sidecar file save location
To choose where the Pixelmator Pro sidecar files will be saved on your Mac, click the Save Sidecar Files In pop-up menu and choose an option.
iCloud. Saves Pixelmator Pro sidecar files in a dedicated folder in iCloud. You can use this option if you work with Pixelmator Pro across multiple devices or if you are looking to save space on your Mac.
Pictures. Saves Pixelmator Pro sidecar files in a dedicated folder on your Mac, which is recommended if you typically work with Pixelmator Pro offline.
Manage sidecar files
In the Editing settings, you can keep track of the number of Pixelmator Pro sidecar files on your Mac and just how much space they take up on your Mac. If you'd like to manage your sidecar files, you can click Manage Files to open the dedicated Sidecar folder and find all the sidecar files there. Alternatively, you can choose File > Sidecar > Reveal Sidecar File to reveal a sidecar file of a specific image you've got opened.
Note: Sidecar files are not managed for you automatically. For instance, if you manually unlink the sidecar file from an edited image or delete the edited image from your Mac completely, its sidecar file will not be deleted.
To delete a sidecar file, do any of the following:
- Choose File > Sidecar > Reveal Sidecar File and delete the sidecar file from your Mac.
- Choose File > Sidecar > Delete Sidecar File.
Note: If you delete the sidecar file without deleting the linked image, the nondestructive edits will be merged the next time you open the image. If, however, you had Auto Save and Versions option turned on, you can still revert the image to the original using File > Revert To > Browse All Versions.
Use Auto Save and Versions
Auto Save is a macOS feature that lets you automatically save your progress as you work. So, in case you accidentally quit the app or your device loses power, your work won't be lost. And, with macOS Versions, you can revert your document to any of its previously saved versions.
It's recommended to always keep Auto Save and Versions turned on, especially if you're working with Pixelmator Pro destructively. This way, if you no longer like the changes you've made, you can always roll back your image to a previous version or revert it to the original.
