Table of Contents
Set Rulers settings
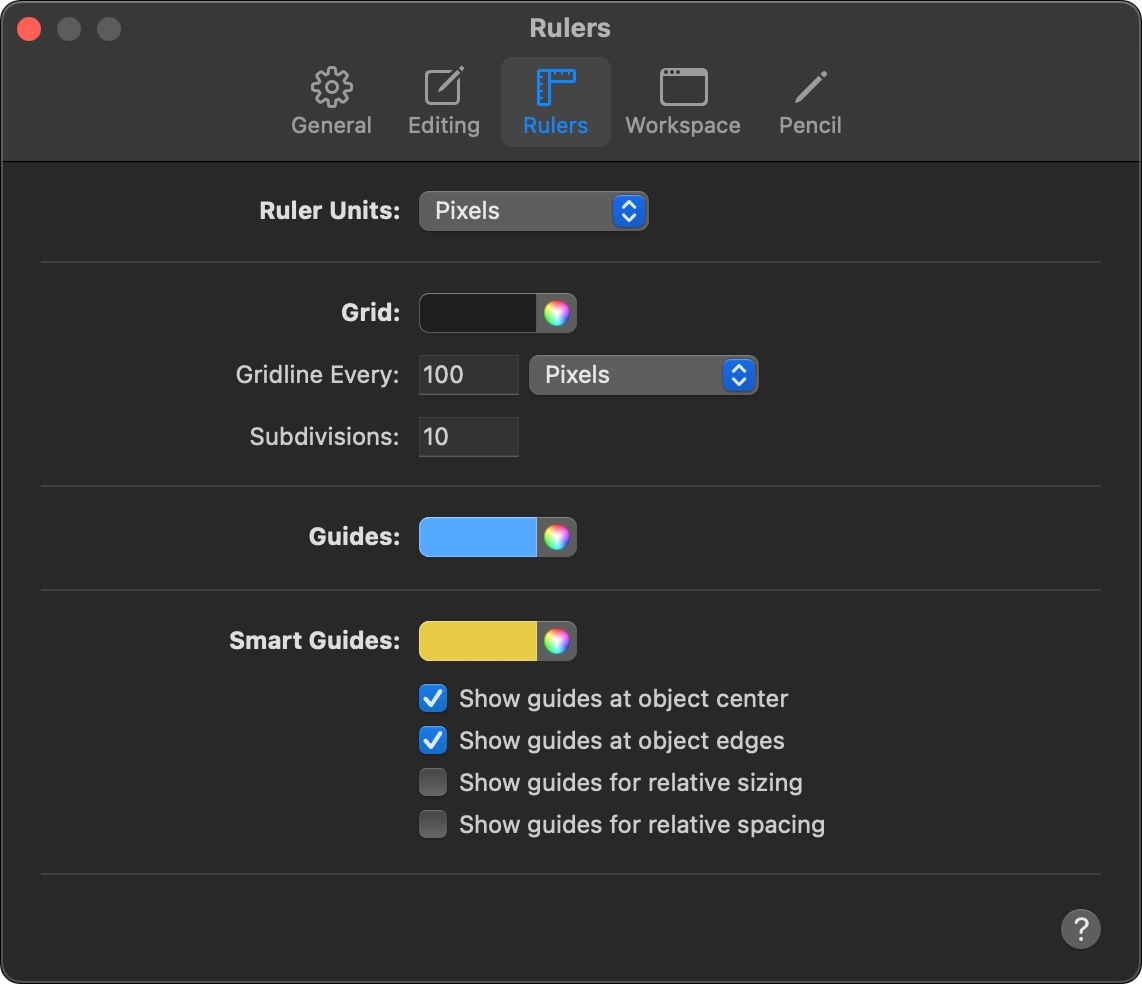
The Rulers' settings let you change the rulers' measurement units, the colors of the guides or grid, the spacing between gridlines and grid subdivisions. You can also turn on or off the alignment and object spacing guides.
Change the ruler measurement unit
You can change the ruler units from pixels to percent or physical units such as centimeters, millimeters, or inches.
- Choose Pixelmator Pro > Settings (from the Pixelmator Pro menu at the top of your screen).
- In the Rulers tab, click the Ruler Units pop-up menu and choose Percent, Pixels, Centimeters, Millimeters or Inches.
Customize the color, spacing, and subdivisions of the grid
A grid is a set of nonprinting lines that help accurately position objects on the canvas. You can change the grid's color or spacing to suit a specific document.
- Choose Pixelmator Pro > Settings (from the Pixelmator Pro menu at the top of your screen).
- In the Rulers tab, do any of the following:
- Change the color of the grid: Click the Grid color well to pick a color or click
 to open the Colors window. You can also change the brightness and opacity of the grid by dragging the Brightness and Opacity sliders.
 - Change the spacing of the grid: Click the number next to Gridline Every and type in a new value. This value determines the spacing between the gridlines. You can also click the pop-up menu to choose the grid spacing unit.
- Change the subdivisions of the grid: Click the number next to Subdivisions and type in a new value. This value determines how many sub-sections there will be within the gridlines.
- Change the color of the grid: Click the Grid color well to pick a color or click
Change the Guides settings
You can change the color of the persistent alignment guides that you add from the View menu or using Rulers.
- Choose Pixelmator Pro > Settings (from the Pixelmator Pro menu at the top of your screen).
- In the Rulers tab, click the Guides color well to pick a color or click to open the Colors window. You can also change the brightness and opacity of the alignment guides by dragging the Brightness and Opacity sliders.
Important: Guides are nonprinting lines that help you arrange objects and are not part of the image themselves.
Change the Smart Guides settings
Customize the Smart Guides to change their color or to turn specific Smart Guides on or off.
- Choose Pixelmator Pro > Settings (from the Pixelmator Pro menu at the top of your screen).
In the Rulers tab, do any of the following:
- Change the color of the guides: Click the Smart Guides color well to pick a color or click to open the Colors window. You can also change the brightness and opacity of the guides by dragging the Brightness and Opacity sliders.
Turn Smart Guides on or off:
- "Show guides at object center" shows guides when the center of an object aligns with the center of another object or the center of the image.
- "Show guides at object edges" shows guides when the edges of an object align with the edge of another object or an edge of the image.
- "Show guides for relative sizing" shows guides when an object matches the size of another object.
- "Show guides for relative spacing" shows guides when three or more objects are placed equally apart in a line.
- Change the color of the guides: Click the Smart Guides color well to pick a color or click
Important: Guides are nonprinting lines that help you arrange objects and are not part of the image themselves.
