Table of Contents
Adjust the tonal curve of an image
The Curves adjustment is one of the most versatile color adjustments. You can use Curves for almost everything — adjusting the tones and contrast of an image, or creating artistic effects. Because of the different ways you can use Curves, it can often work as a substitute for other color adjustments such as Lightness, White Balance, or Channel Mixer.
The Curves adjustment works by selectively adjusting the tonal values of an image. The image tonality itself is represented by a diagonal line crossing a square graph.
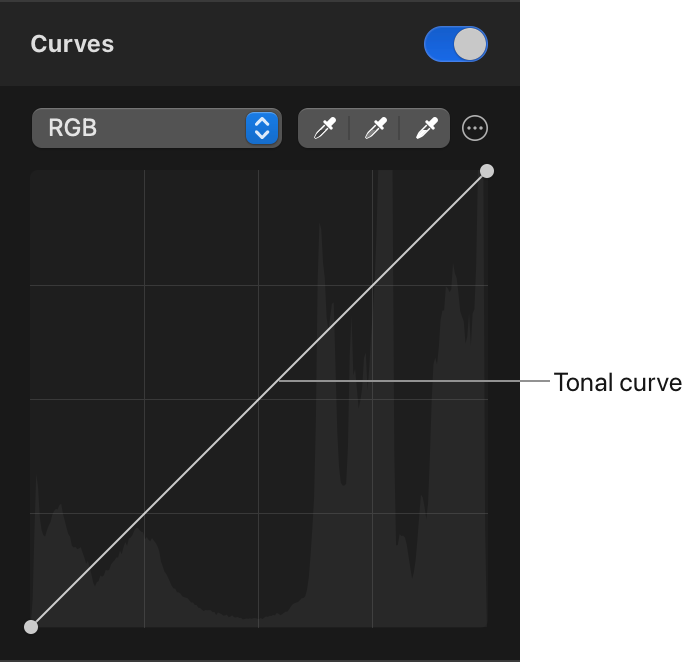
The dark values are on the left side of the graph and the light values on the right. You can add points to the tonal curve and drag the tonal curve up or down depending on whether you wish to darken, lighten, or change a particular value in an image. The shape of the diagonal line changes as you add and drag the points and often ends up looking like a curve which gave the adjustment its name.
Adjust the tonal curve of an image
The Curves adjustment can be applied directly to a single layer or, using a color adjustments layer, to multiple layers in a composition.
To edit the currently selected layer, do one of the following:
- Choose Format > Color Adjustments > Curves (from the Format menu at the top of your screen).
- In the Tools sidebar, click
 and turn on the Curves adjustment.
 - Press on your keyboard and turn on the Curves adjustment.
- Press + on your keyboard.
To edit multiple layers in a composition using a color adjustments layer (all layers below this layer will be affected):
- Choose Insert > Color Adjustments (from the Insert menu at the top of your screen) and turn on the Curves adjustment in the Tool Options pane.
- Click
 at the top of the
Layers sidebar, choose Color Adjustments, and turn on the Curves adjustment.
at the top of the
Layers sidebar, choose Color Adjustments, and turn on the Curves adjustment. - Press + + on your keyboard, and turn on the Curves adjustment.
Note: If the adjustment isn't visible, you can turn it on from the Customize menu at the bottom of the Color Adjustments pane.
Curves adjustment overview
The Curves adjustment consists of a few different sections:
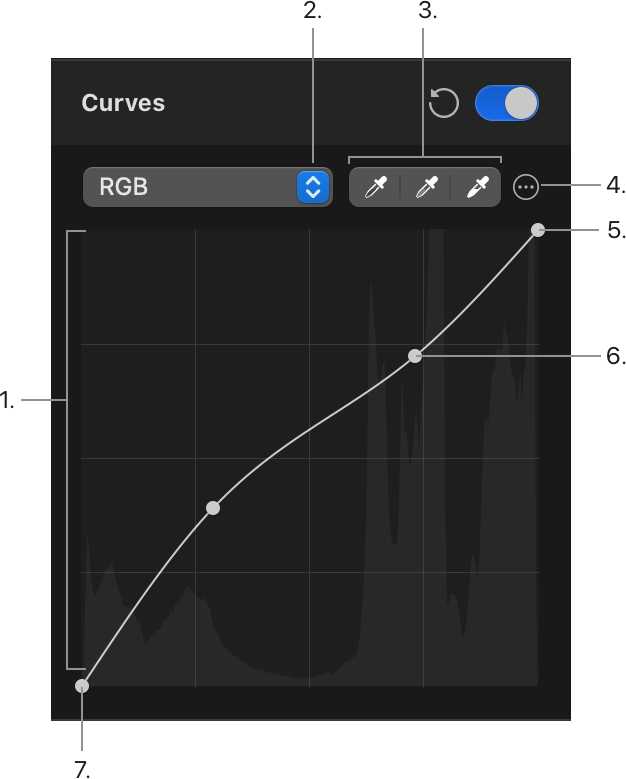
Histogram. Shows the distribution of highlights, shadows, or midtones to help adjust the curves accordingly.
The Curves adjustment pop-up menu. Click it to choose which channels to adjust.
Black, gray, and white color pickers. You can use these color pickers to automatically adjust the curves in different RGB channels.
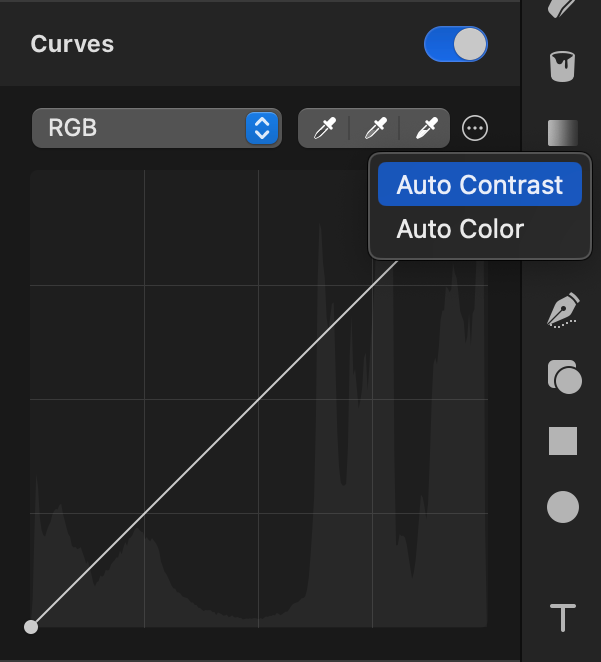
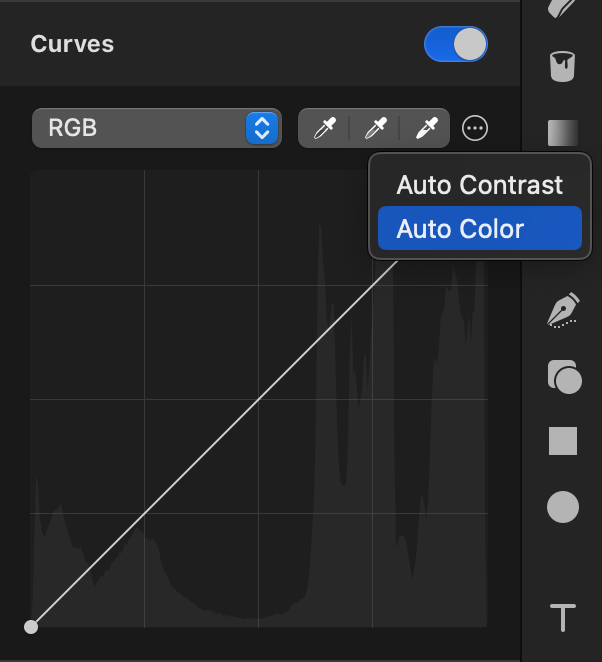
More menu. Click it to apply Auto Contrast and Auto Color.
White point. You can drag this point to the left to add more of the pure white color to your image.
Control point. Click the curve to add new points. RGB images have 255 different values for each of the three channels, ranging from 0 (completely black) to 255 (completely white). Every new point you add to the tonal curve (and you can add up to 14 of them) will have its own assigned value. Drag the points off of the graph to remove them.
Black point. You can drag this point to the right to add more of the pure black color to your image.
Adjust image highlights, midtones, and shadows
Adjust the different sections of the curve:
- To adjust the highlights, click the top section of the curve to add a new point. Drag the point up to brighten the highlights or down to darken them.
- To adjust the shadows, click the bottom section of the curve to add a new point. Drag the point up to brighten the shadows or down to darken them.
To adjust the midtones, click the middle section of the curve to add a new point. Drag the point up to brighten the midtones or down to darken them.
You can remove points by dragging them off the Curves graph.
Show Original: Click the Show Original button or press + on your keyboard to see what the image looks like without any color adjustments.
Show Split Comparison: – click the Show Original button, press + on your keyboard, or force click the canvas.
To reset all Color Adjustments, click Reset at the bottom of the Color Adjustments pane.
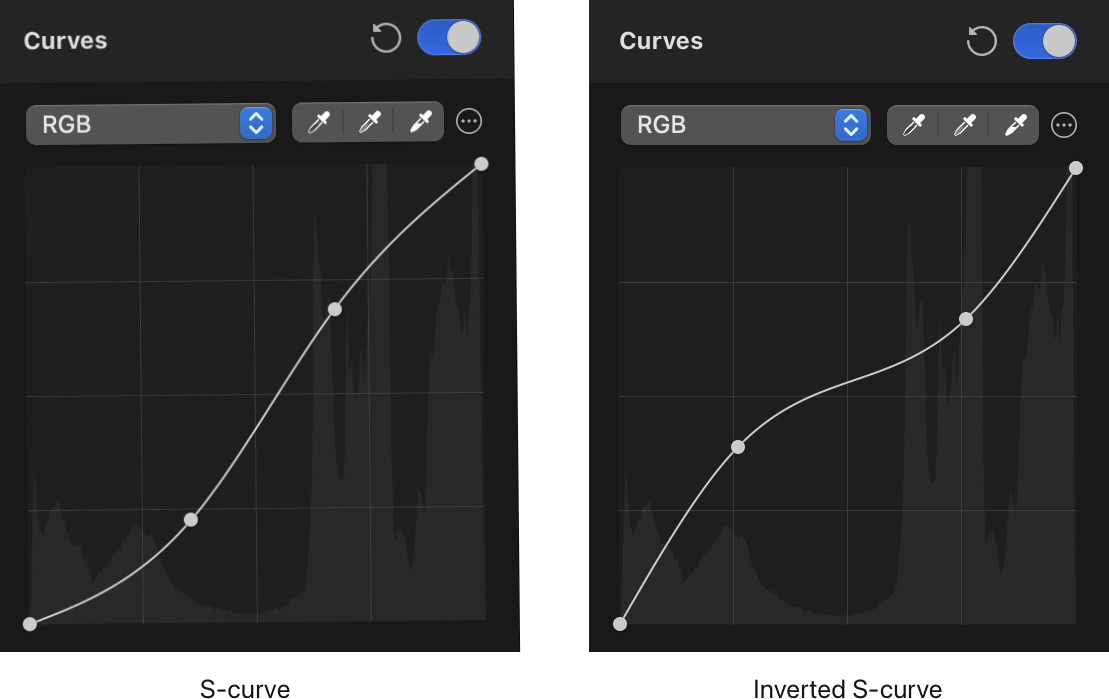
Tip: A couple of the most common Curves adjustments are known as the S-curve and an inverted S-curve. The S-curve adds more contrast to the image, while the inverted S-curve does the exact opposite — reduces it. Extremely steep or very flat curves usually aren’t recommended unless they’re used for a specific artistic effect, such as posterizing. Otherwise, smooth curves usually give the best results.
Adjust individual RGB channels to change the color and tone of an image
When adjusting Red, Green, and Blue channels individually, dragging the curve points upward adds more of that color to an image, while dragging the points down boosts its complementary color instead. The complementary color pairs are cyan for red, magenta for green, and yellow for blue. So, for instance, for an image that has too much blue in the shadows, adding a point somewhere around the bottom of the curve and dragging it down will bring in more yellow to neutralize the blue. This also works vice versa — you can neutralize a yellow image by dragging the blue channel curve up.
Click the Curves pop-up menu and choose Red, Green, or Blue.
Click the tonal curve to add a new point and drag it to adjust the colors.
Show Original: Click the Show Original button or press + on your keyboard to see what the image looks like without any color adjustments.
Show Split Comparison: – click the Show Original button, press + on your keyboard, or force click the canvas.
To reset all Color Adjustments, click Reset at the bottom of the Color Adjustments pane.
Automatically enhance image contrast
The Auto Contrast adjustment automatically adjusts the luminance of an image:
- Click the More
 menu and choose Auto Contrast.
Show Original: Click the Show Original button or press + on your keyboard to see what the image looks like without any color adjustments.
Show Split Comparison: – click the Show Original button, press + on your keyboard, or force click the canvas.
To reset all Color Adjustments, click Reset at the bottom of the Color Adjustments pane.
Automatically enhance image colors
The Auto Color adjustment automatically adjusts the Red, Green, and Blue channels of an image:
- Click the More menu and choose Auto Color.
Show Original: Click the Show Original button or press + on your keyboard to see what the image looks like without any color adjustments.
Show Split Comparison: – click the Show Original button, press + on your keyboard, or force click the canvas.
To reset all Color Adjustments, click Reset at the bottom of the Color Adjustments pane.
Automatically enhance an image by setting black, gray, and white points
In the top-right corner of the Curves adjustment, you’ll notice three color pickers:
- Set the black point: Use the color picker on the left to pick an area in an image that should be pure black. The curves in the Red, Green and Blue channels are automatically adjusted.
- Set the grey point: Use the middle color picker to pick an area in an image that should be midtoned.
- Set the white point: Use the color picker on the right to pick an area in an image that should be pure white.
Show Original: Click the Show Original button or press + on your keyboard to see what the image looks like without any color adjustments.
Show Split Comparison: – click the Show Original button, press + on your keyboard, or force click the canvas.
To reset all Color Adjustments, click Reset at the bottom of the Color Adjustments pane.


