Table of Contents
Apply color adjustment effects
The Color Adjustments category features effects that let you change the colors, light, and contrast of an image or add special effects.
Adjust the colors of an image
Color Adjustments effects can be applied directly to a single layer or, using an effects layer, to multiple layers in a composition.
To adjust colors of the currently selected layer, do one of the following:
- Choose Format > Effects > Color Adjustments (from the Format menu at the top of your screen) and choose the sharpen effect you want.
- Click
 in the
Tools sidebar, then click Add Effect and add the Color Adjustments effect you want.
in the
Tools sidebar, then click Add Effect and add the Color Adjustments effect you want. - Press on your keyboard, click Add Effect and add the Color Adjustments effect you want.
To adjust colors of multiple layers in a composition using an effects layer (all layers below this layer will be affected):
- Choose Insert > Effects (from the Insert menu at the top of your screen), click Add Effect in the Tool Options pane and add the Color Adjustments effect you want.
- Click
 at the top of the
Layers sidebar, choose Effects, click Add Effect in the Tool Options pane and add the Color Adjustments effect you want.
at the top of the
Layers sidebar, choose Effects, click Add Effect in the Tool Options pane and add the Color Adjustments effect you want. - Press + + on your keyboard, click Add Effect in the Tool Options pane and add the Color Adjustments effect you want.
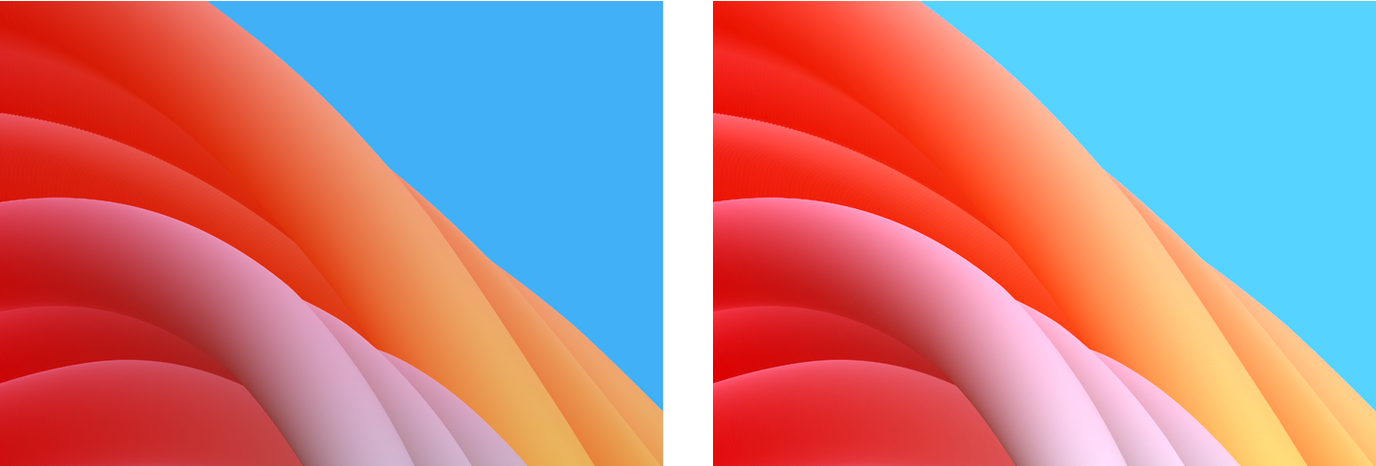
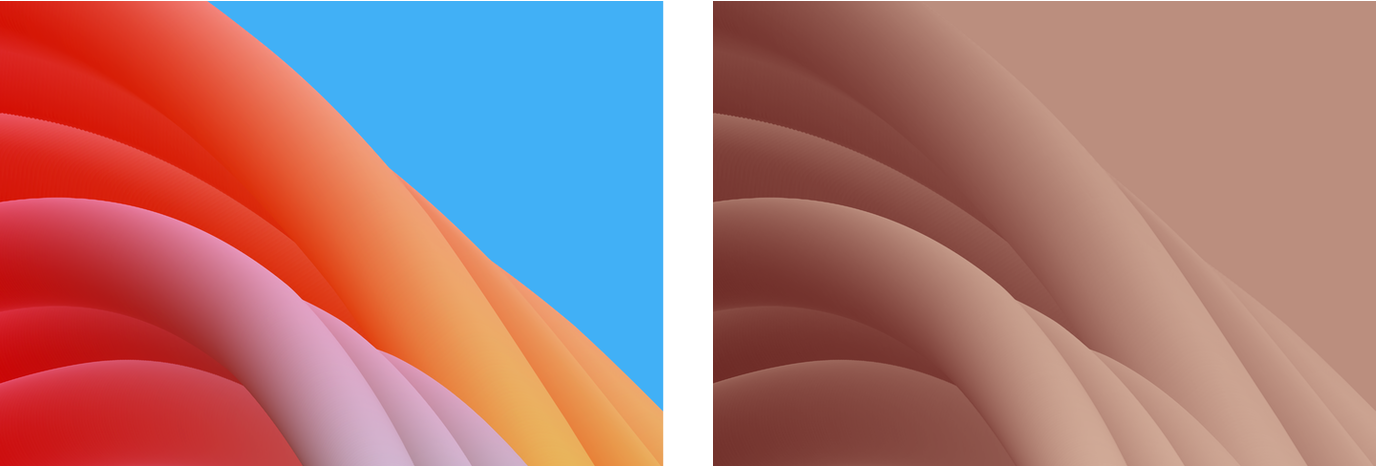
Apply a Color Controls effect
The Color Controls effect lets you adjust the saturation, brightness, and contrast of your selected layer.
Customize the effect:
Move the Saturation slider to the right to make colors more intense, or to the left to reduce their intensity. You can also enter a value from 0% to 200%. Moving the slider all the way to the left (or entering 0%) will remove all color, turning the image black and white.
Move the Brightness slider to the right to make colors lighter or to the left to make them darker. You can also enter a value from -100% to 100%.
Move the Contrast slider to the right to increase contrast or to the left to decrease it. You can also enter a value from 20% to 400%.
Show Original: Click the Show Original button or press + on your keyboard to see what the image looks like without any effects.
Show Split Comparison: – click the Show Original button, press + on your keyboard, or force click the canvas.
To reset all effects, click Reset at the bottom of the Tool Options pane.
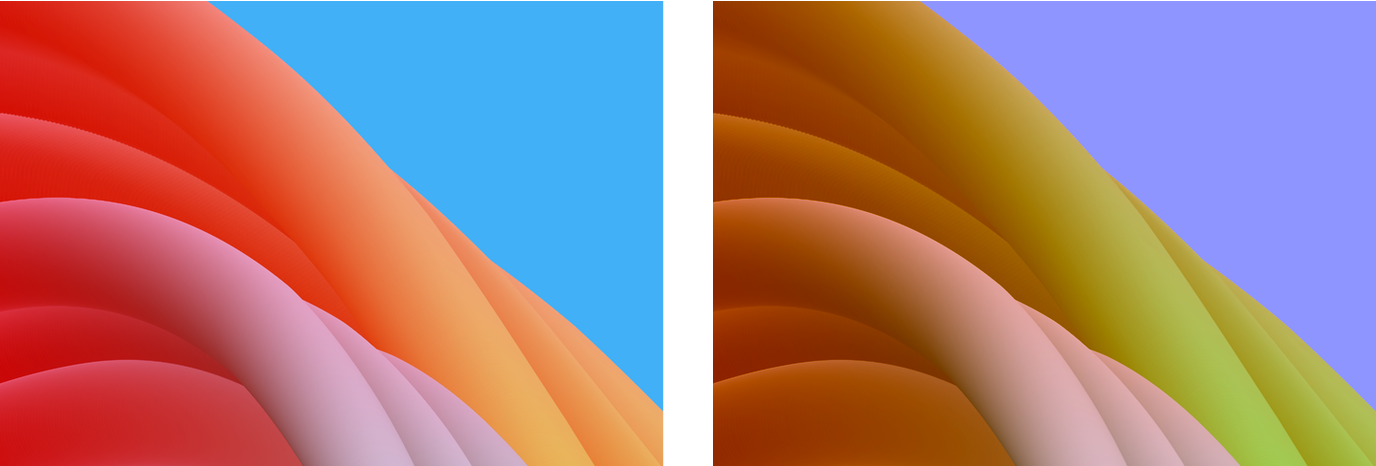
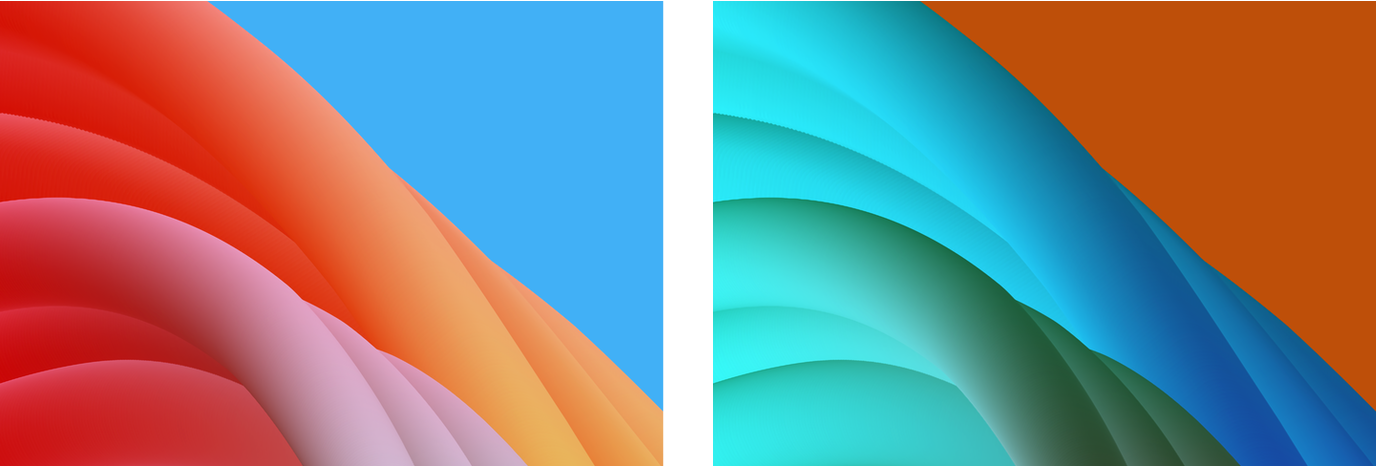
Apply a Hue Adjust effect
The Hue Adjust effect shifts all the colors in an image along the color spectrum.
- Move the Angle wheel to change the hues of every color in the image. You can also enter a value from 0.0º to 359.9º.
Show Original: Click the Show Original button or press + on your keyboard to see what the image looks like without any effects.
Show Split Comparison: -click the Show Original button, press + on your keyboard, or force click the canvas.
To reset all effects, click Reset at the bottom of the Tool Options pane.
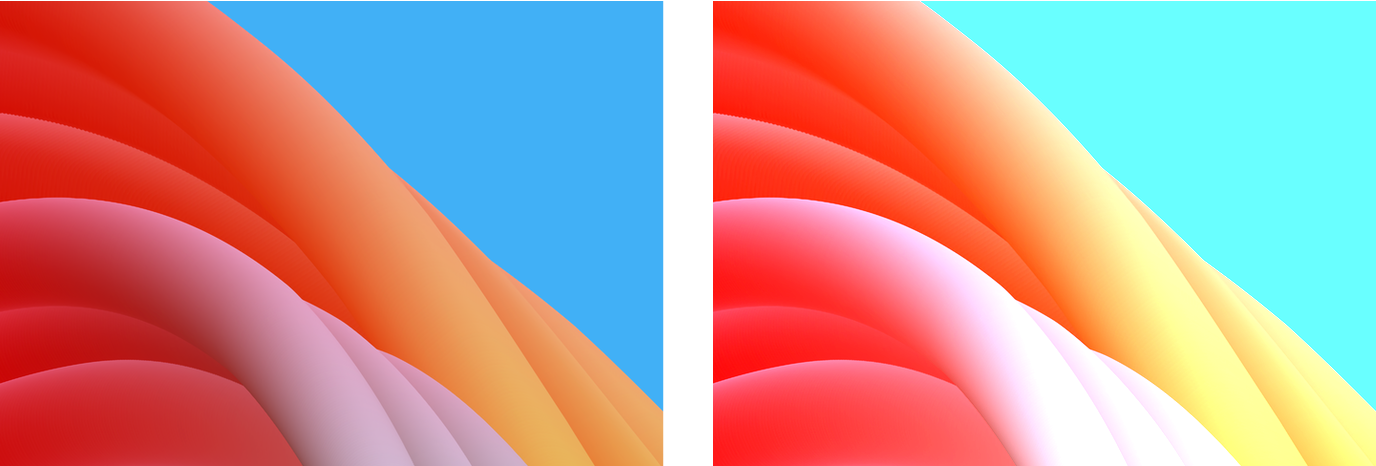
Apply an Exposure Adjust effect
The Exposure Adjust effect works in a similar way to changing the exposure settings of a digital camera — it makes the entire image (the shadows, midtones, and highlights together) brighter or darker.
- Move the EV slider to the right to make the entire image brighter or to the left to make it darker. You can also enter a value from -1000% to 1000%.
Show Original: Click the Show Original button or press + on your keyboard to see what the image looks like without any effects.
Show Split Comparison: – click the Show Original button, press + on your keyboard, or force click the canvas.
To reset all effects, click Reset at the bottom of the Tool Options pane.
Apply a Color Monochrome effect
The Color Monochrome effect converts an image to black and white while also adding a color tint.
Customize the effect:
Click the color well to choose a color or click
 to open the Colors window.
Move the Intensity slider to the left bring back some of the original colors to the image. You can also enter a value from 0% to 100%.
Show Original: Click the Show Original button or press + on your keyboard to see what the image looks like without any effects.
Show Split Comparison: – click the Show Original button, press + on your keyboard, or force click the canvas.
To reset all effects, click Reset at the bottom of the Tool Options pane.
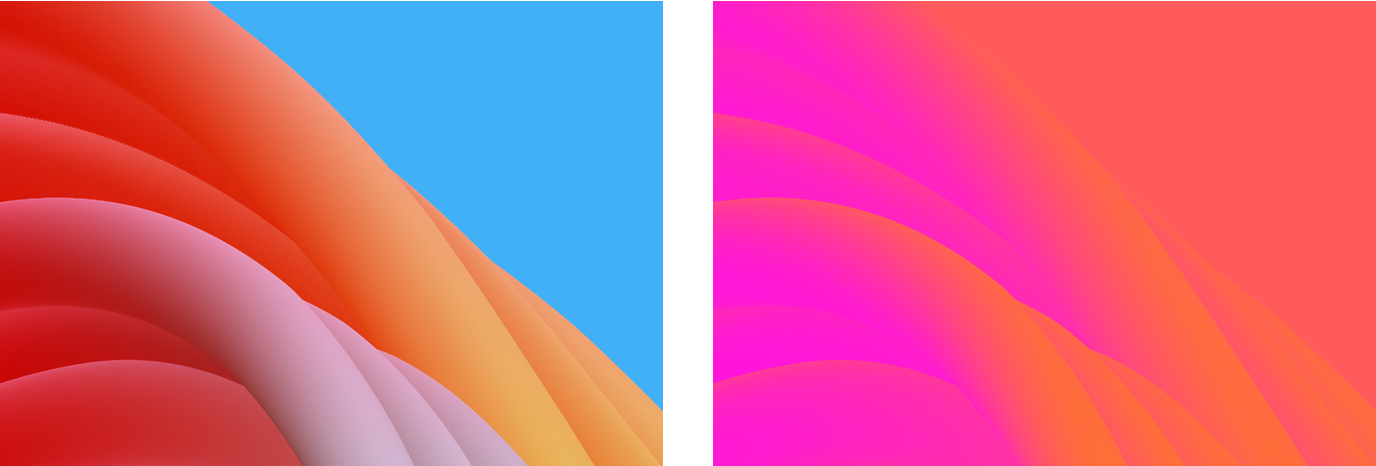
Apply a False Color effect
The False Color effect lets you recolor an image using two colors.
Customize the effect:
Click the Color 1 color well to choose a new color for the shadows (or darkest colors) or click
to open the Colors window. You can also hold down the key on your keyboard to quickly pick a color from the image.Click the Color 2 color well to choose a new color for the highlights (or lightest colors) or click
to open the Colors window. You can also hold down the key on your keyboard to quickly pick a color from the image.
Show Original: Click the Show Original button or press + on your keyboard to see what the image looks like without any effects.
Show Split Comparison: – click the Show Original button, press + on your keyboard, or force click the canvas.
To reset all effects, click Reset at the bottom of the Tool Options pane.
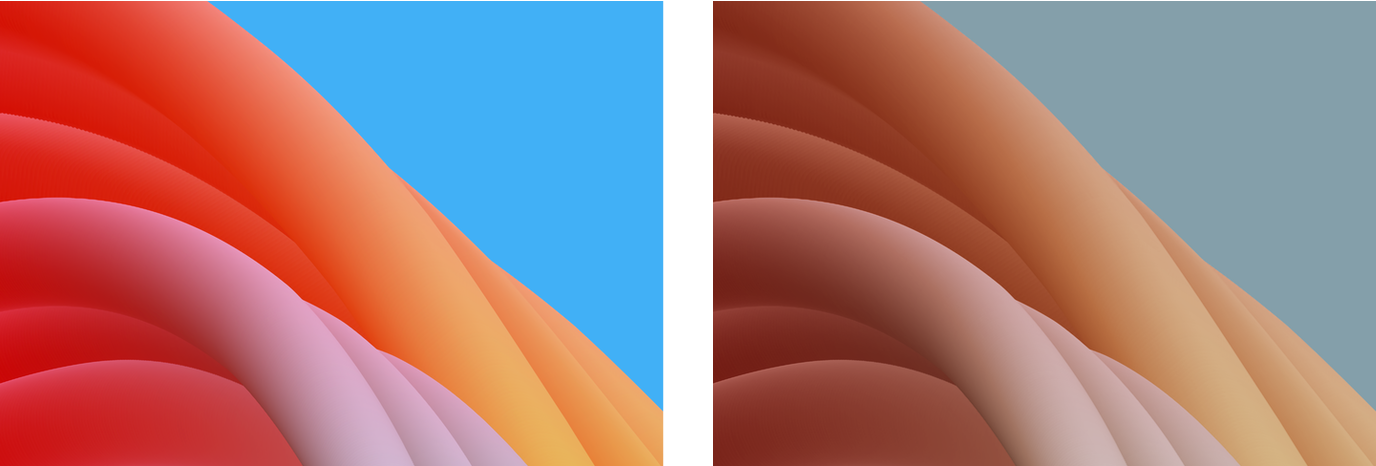
Apply a Sepia Tone effect
The Sepia Tone effect maps the colors of an image to various shades of brown.
- Drag the Intensity slider to control the strength of the Sepia effect.

Show Original: Click the Show Original button or press + on your keyboard to see what the image looks like without any effects.
Show Split Comparison: – click the Show Original button, press + on your keyboard, or force click the canvas.
To reset all effects, click Reset at the bottom of the Tool Options pane.
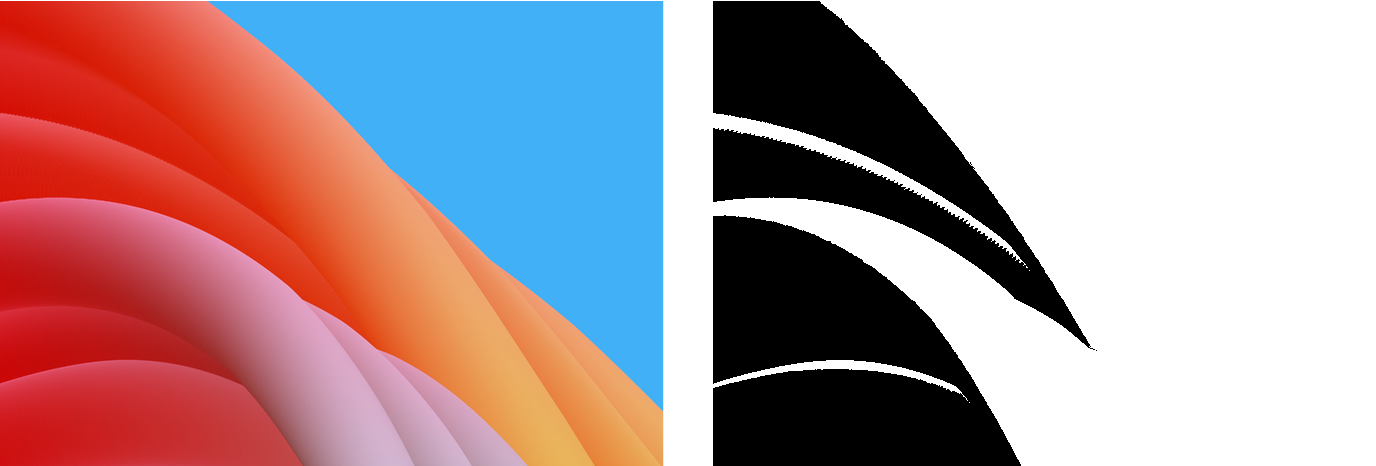
Apply a Threshold effect
The Threshold effect converts all the colors in an image to high-contrast, black-and-white colors.
- Drag the Threshold slider to the right to increase the Threshold level, or to the left to decrease it.
Show Original: Click the Show Original button or press + on your keyboard to see what the image looks like without any effects.
Show Split Comparison: – click the Show Original button, press + on your keyboard, or force click the canvas.
To reset all effects, click Reset at the bottom of the Tool Options pane.
Apply an Invert effect
The Invert effect inverts image colors. The Invert effect is not customizable — you can either turn it on or off. To have more control over how the adjustment blends with the layer, use the Invert adjustment in Color Adjustments or add it as an adjustments layer.
Show Original: Click the Show Original button or press + on your keyboard to see what the image looks like without any effects.
Show Split Comparison: – click the Show Original button, press + on your keyboard, or force click the canvas.
To reset all effects, click Reset at the bottom of the Tool Options pane.
Apply a Gradient Map effect
The Gradient Map effect maps out the color values of an image and replaces them with the colors of a selected gradient. Used in combination with different blend modes, the Gradient Map effect can be used to subtly tint colors or give images an entirely different look and feel.
Customize the effect:
Click the gradient well to choose a gradient preset or click the existing color stops to choose your own colors.
Move the Opacity slider to the left bring back some of the original colors to the image. You can also enter a value from 0% to 100%.
Click the Blend Mode pop-up menu — the words "Opacity (Normal)" — and choose a blend mode.
Show Original: Click the Show Original button or press + on your keyboard to see what the image looks like without any effects.
Show Split Comparison: – click the Show Original button, press + on your keyboard, or force click the canvas.
To reset all effects, click Reset at the bottom of the Tool Options pane.


