Table of Contents
Use layer masks
A layer mask is like an additional sheet you can place over a layer or layer group to hide parts of it. Layer masks are nondestructive because even though the parts they hide are no longer shown, the original layer is fully preserved and if you turn off or remove the mask, the full layer will reappear. You can also go back to make adjustments to layer masks after adding them.
Place a mask over a layer or layer group
- In the Layers sidebar, click to select a layer or layer group.
Do one of the following:
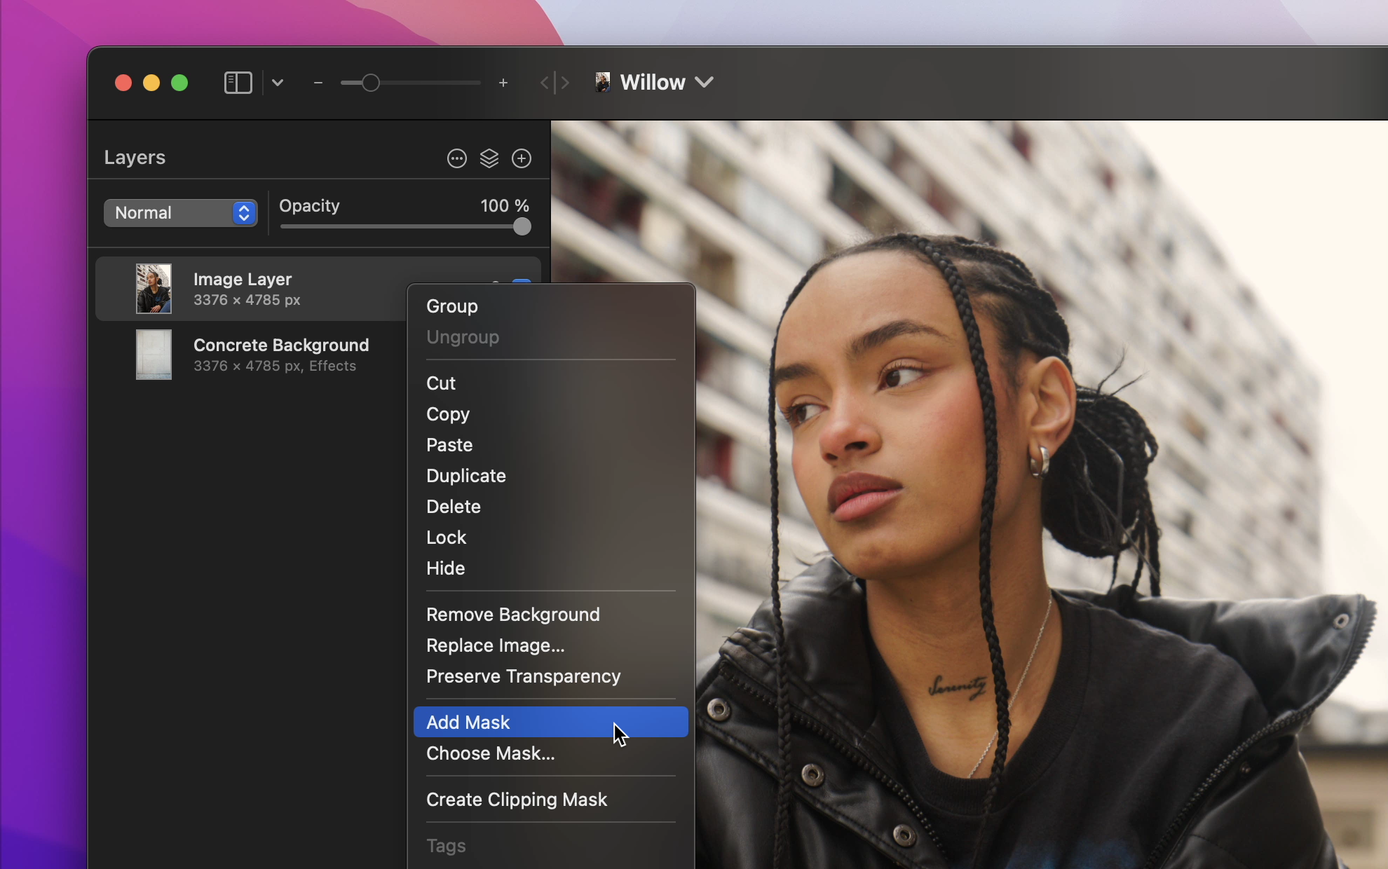
- Choose Format > Mask > Add Mask (from the Format menu at the top of your screen).
- In the Layers sidebar, – click a layer or layer group and choose Add Mask. You can also – click Add Mask to add mask and hide the layer.
- In the Layers sidebar, – click a layer or layer group and click Choose Mask. Browse your device to find an image you'd like to use for a mask.
- Command-drag any image, shape, text, or image from Finder onto a layer to create a mask.
Edit a layer mask
When you place a layer mask over an image, it is completely white by default. The completely white parts of a mask are 100% transparent, meaning everything below the white areas is visible. If you paint over the mask with pure black, the areas you paint over are completely hidden. Pure white is 100% transparent, pure black is 0% transparent, and shades of grey range from 1% to 99% transparency — the darkest grey is 1% transparent, 50% grey is 50% transparent, and off-white is 99% transparent.
- To edit a layer mask, you'll first need to select it. Do one of the following:
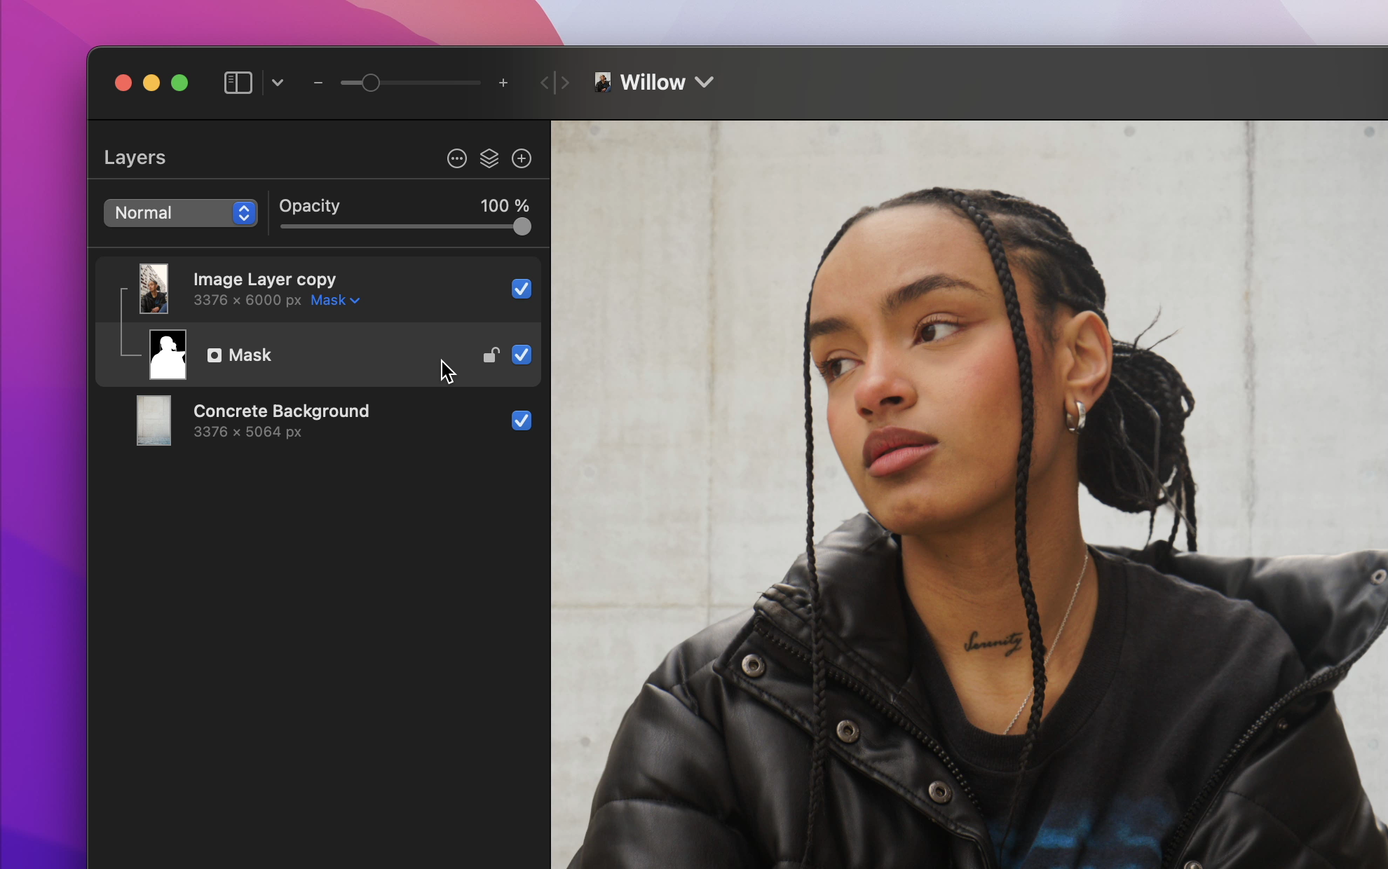
- In the Layers sidebar select or enable the mask layer. You'll recognize mask layers from the
 icon next to them. If the mask layer is subtracted, click the Mask button to reveal it.
 - Select the masked layer and choose Format > Mask > Edit Mask (from the Format menu at the top of your screen).
- In the Layers sidebar select or enable the mask layer. You'll recognize mask layers from the
Select the Paint tool and paint on the mask with black or white brushes to edit it.
If you’d like to gradually reveal a layer from a completely hidden state, select the Color Fill tool and fill the layer mask with pure black or press + on your keyboard to invert the mask. Then, you can paint with white or grey to reveal the layer.
Tip: When working with layer masks, the keyboard shortcuts (which resets the primary and secondary colors in Pixelmator Pro to black and white) and (which switches between the primary and secondary colors) are especially useful.
Refine a layer mask
Once you've made edits to your mask, you can refine it using the Refine Mask tool.
- To choose the Refine Mask tool, do one of the following:
- In the Layers sidebar, – click the layer mask, and choose Refine Mask.
- In the Layers sidebar – click the masked layer, and choose Refine Mask.
- Select the layer over which you have placed a mask. Then, choose Format > Mask > Refine Mask (from the Format menu at the top of your screen).
- Refine your mask by adjusting the options in the Tool Options pane:
- Shape Roundness: Adjust how much to round the mask outline.
- Edge Softness: Adjust how much to soften the edges of the mask outline. With softer edges, the masked area will blend in better with other parts of the image should you copy or edit it.
- Expand: Change the size of the mask.
- Mask Subject: Automatically create a mask for the subject in your image.
- Smart Refine: Use a machine learning-based algorithm to intelligently detect intricate details like hair or fur at the edges of the mask and automatically refine the outline.
- Invert Mask: Inverting a mask makes the opaque areas of the masked image transparent and vice versa.
Add or subtract areas from the mask:
- Use the Refine Edge Brush to add or subtract only at the edges of the mask.
- Use the Quick Selection Brush to add or subtract from the mask as if using the Quick Selection tool.
- Use the Basic Brush to add or subtract from the mask as if painting with a basic brush.
Turn a layer mask on or off
Do one of the following:
In the Layers sidebar, select the visibility checkbox next to a mask to turn it on or deselect it to turn it off.
In the Layers sidebar, – click the layer mask, and choose Disable (or Enable) Mask.
In the Layers sidebar – click the masked layer, and choose Mask > Disable (or Enable) Mask.
Select the layer over which you have placed a mask. Then, choose Format > Mask > Disable Mask or Enable Mask (from the Format menu at the top of your screen).
Permanently remove a layer mask
Do one of the following:
In the Layers sidebar, – click the layer mask, and choose Remove Mask.
In the Layers sidebar, – click the masked layer, and choose Remove Mask.
Select the layer over which you have placed a mask. Then, choose Format > Mask > Remove Mask (from the Format menu at the top of your screen).
Select the layer over which you have placed a mask. Then, press on your keyboard.
Link and unlink a layer mask
If you need to move or transform a layer or its mask separately from one another, you can unlink the layer mask.
To link or unlink a layer mask, do one of the following:
In the Layers sidebar, double-click the link line of the mask.
In the Layers sidebar, – click the layer mask, and choose Link (or Unlink) Mask.
In the Layers sidebar – click the masked layer, and choose Mask > Link (or Unlink) Mask.
Select the layer over which you have placed a mask. Then, choose Format > Mask > Link Mask or Unlink Mask (from the Format menu at the top of your screen).
Layers and their masks are connected by a link line. If the link line is solid — the mask is linked. If the line is dashed, this means the mask is unlinked.
Move or copy a layer mask from one layer to another
To move a layer mask:
- In the Layers sidebar with the view set to List, drag the layer mask thumbnail from one layer to another. You can also drag masks from one Pixelmator Pro document to the other. A copy of the original mask will be created in the new document.
To copy a layer mask:
- In the Layers sidebar with the view set to List, press and hold the key and drag the layer mask from one layer to another. You can also copy masks from one Pixelmator Pro document to the other.
Create a layer mask from an image
You can create a layer mask from any image on your Mac. Any areas of the image mask that are 100% black will be hidden, areas that are 100% white will be opaque, while any other colors in-between will partially hide the layer.
- In the Layers sidebar, select a layer you would like to mask.
- Choose Format > Mask > Choose Mask (from the Format menu at the top of your screen).
- Select an image to use as a layer mask and click Add Mask.
Create a layer mask from a selection
In Pixelmator Pro, you can create layer masks from selections. Any areas outside the active selection will be hidden, any partially selected areas will be partially hidden, and any fully selected areas will be fully shown.
- Make a selection in your image.
Do one of the following:
- Click Select and Mask in the Tool Options pane. Then, in the Output pop-up menu, select Mask or New Layer with Mask.
- Select the layer you would like to mask. Then, choose Format > Mask > Add Mask (from the Format menu at the top of your screen).
- In the Layers sidebar, – click the layer you would like to mask, and choose Add Mask.
- – click Add Mask to hide the inside of the selection instead of what's outside of it.
After doing this, you can make changes to the layer mask by editing it.
Move and resize a layer mask
You can move a layer mask independently from the layer it is masking.
- Select the layer or layer group over which you have placed the mask.
- Choose Format > Mask > Edit Mask (from the Format menu at the top of your screen).
Select the Arrange tool
 and drag the mask in your image to move it or drag one of the mask's handles to resize it.
Tip: To move a masked layer together with its mask, simply move the layer itself.
Invert a layer mask
Inverting a mask makes the opaque areas of the masked image transparent and vice versa.
- In the Layers sidebar, click to select a layer mask.
- Do any of the following:
- Choose Format > Invert Colors (from the Format menu at the top of your screen).
- Press + on the keyboard.
- In the Layers sidebar – click the masked layer, and choose Mask > Invert Colors.
Replace a layer mask
You can replace the contents of a layer mask with any other image on your Mac.
- In the Layers sidebar, click to select a layer mask.
- Do any of the following:
- Choose Format > Mask > Replace Mask (from the Format menu at the top of your screen).
- In the Layers sidebar – click the layer mask, and choose Mask > Replace Mask.


