Table of Contents
Apply distortion effects
The Distortion category features the Bump, Pinch, Twirl, Circle Splash, Displacement Map, Hole, Light Tunnel, and Vortex effects — these effects physically distort your selected layer.
Distort an image
Distortion effects can be applied directly to a single layer or, using an effects layer, to multiple layers in a composition.
To distort the currently selected layer, do one of the following:
- Choose Format > Effects > Distortion (from the Format menu at the top of your screen) and choose the distortion effect you want.
- Click
 in the
Tools sidebar, then click Add Effect and add the Distortion effect you want.
in the
Tools sidebar, then click Add Effect and add the Distortion effect you want. - Press on your keyboard, click Add Effect and add the Distortion effect you want.
To distort multiple layers in a composition using an effects layer (all layers below this layer will be affected):
- Choose Insert > Effects (from the Insert menu at the top of your screen), click Add Effect in the Tool Options pane and add the Distortion effect you want.
- Click
 at the top of the
Layers sidebar, choose Effects, click Add Effect in the Tool Options pane and add the Distortion effect you want.
at the top of the
Layers sidebar, choose Effects, click Add Effect in the Tool Options pane and add the Distortion effect you want. - Press + + on your keyboard, click Add Effect in the Tool Options pane and add the Distortion effect you want.
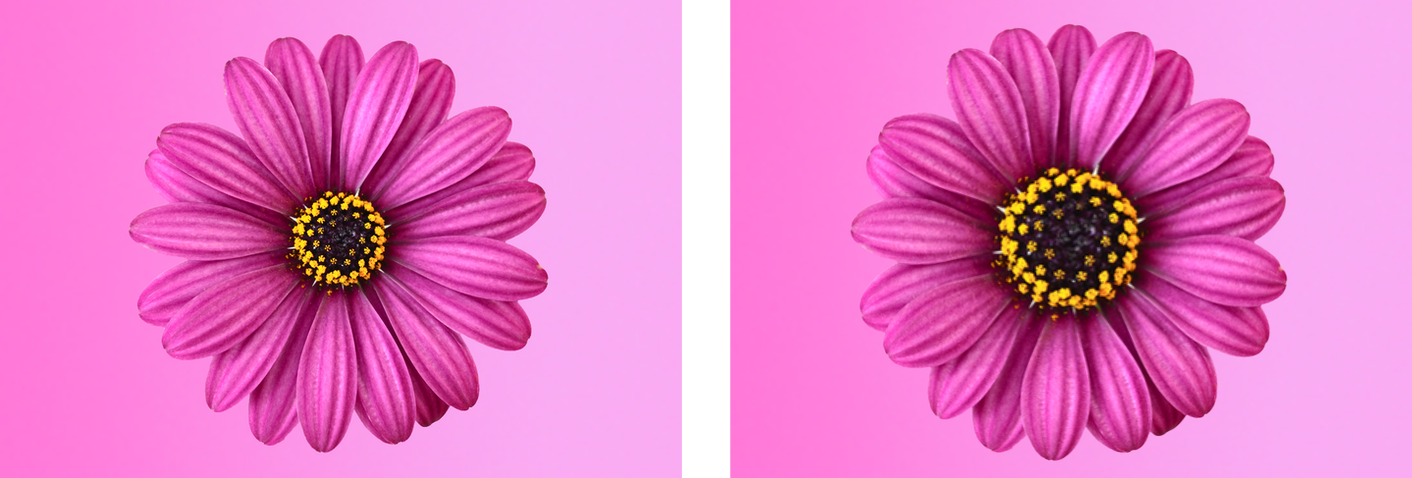
Apply a Bump effect
The bump effect bumps areas inwards or outwards.
- Customize the Bump effect:
- Drag the Radius slider to the right to make the bumped area larger, or to the left to make it smaller. You can also enter a value from 0% to 200%.
- Drag the Scale slider to the right to create an outward bump and increase its size, or to the left to create an inward bump and reduce its size. You can also enter a value from -100% to 100%.
- Move the handle of the effect rope to choose which area should be bumped. If the effect rope isn’t visible, click the Edit button in the Tool Options pane.
Show Original: Click the Show Original button or press + on your keyboard to see what the image looks like without any effects.
Show Split Comparison: – click the Show Original button, press + on your keyboard, or force click the canvas.
To reset all effects, click Reset at the bottom of the Tool Options pane.
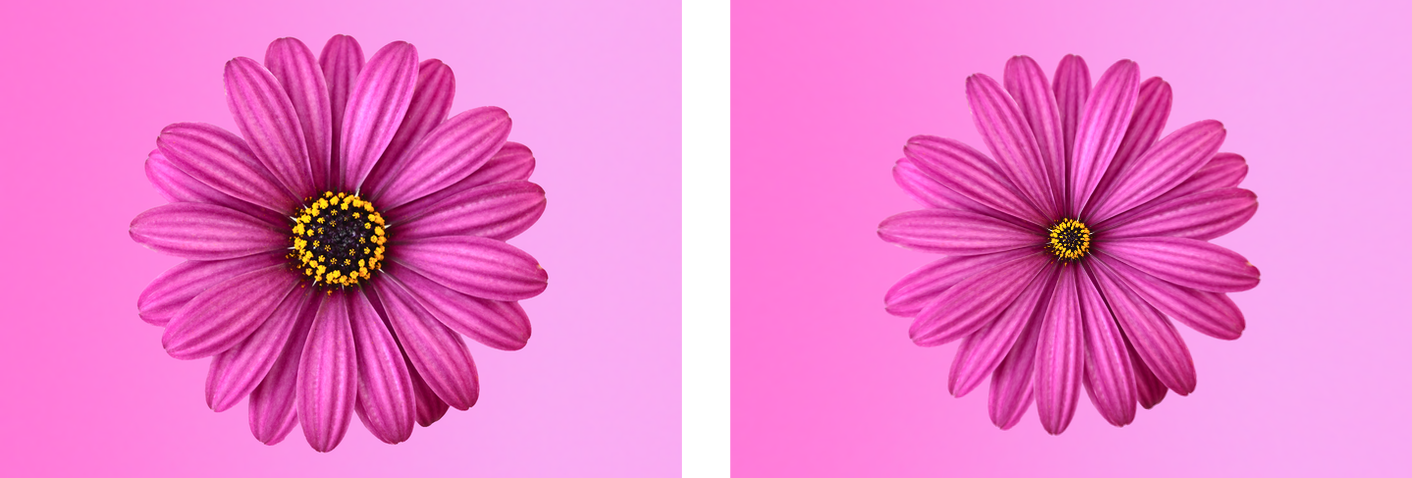
Apply a Pinch effect
The Pinch effect moves the image towards a point, creating a squeezed look.
- Customize the effect:
- Drag the Radius slider to the right to make the pinched area larger, or to the left to make it smaller. You can also enter a value from 0% to 200%.
- Drag the Scale slider to the right to make the pinch more intense or to the left to reduce its intensity. You can also enter a value from 0% to 200%.
- Move the handle of the effect rope to choose which area should be pinched. If the effect rope isn’t visible, click the Edit button in the Tool Options pane.
Show Original: Click the Show Original button or press + on your keyboard to see what the image looks like without any effects.
Show Split Comparison: – click the Show Original button, press + on your keyboard, or force click the canvas.
To reset all effects, click Reset at the bottom of the Tool Options pane.
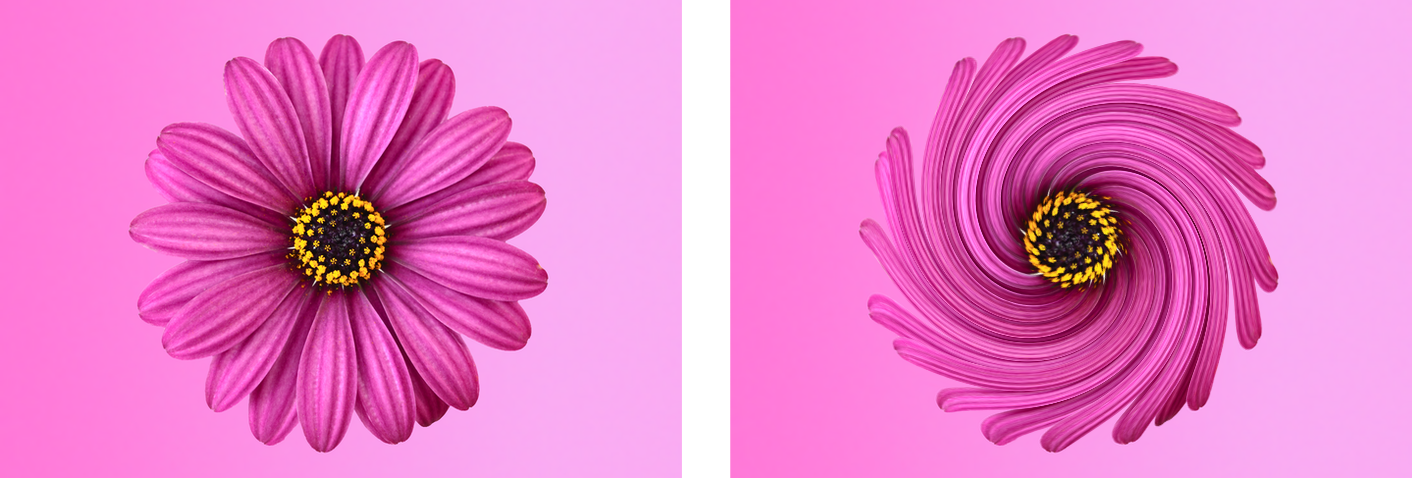
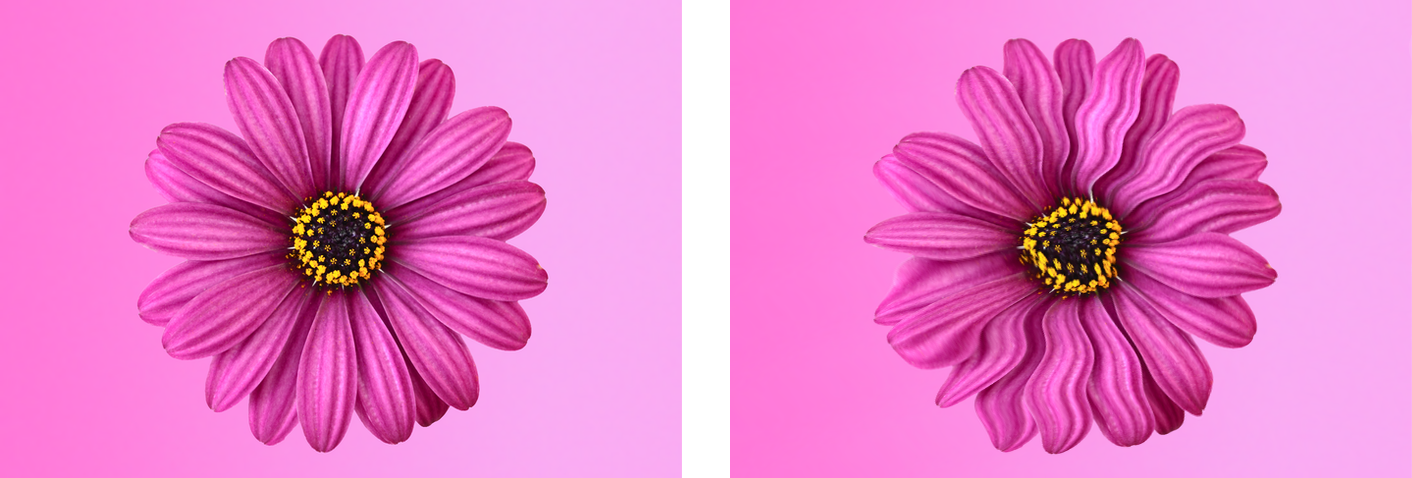
Apply a Twirl effect
The Twirl effect twirls the image clockwise, or counterclockwise.
- Customize the effect:
- Drag the Radius slider to the right to make the twirled area larger, or to the left to make it smaller. You can also enter a value from 0% to 200%.
- Move the Angle wheel to adjust the direction of the twirl. You can also enter a value from 0º to 359.9º.
- Move the handle of the effect rope to choose which area should be twirled. If the effect rope isn’t visible, click the Edit button in the Tool Options pane.
Show Original: Click the Show Original button or press + on your keyboard to see what the image looks like without any effects.
Show Split Comparison: – click the Show Original button, press + on your keyboard, or force click the canvas.
To reset all effects, click Reset at the bottom of the Tool Options pane.
Apply a Circle Splash effect
The Circle Splash effect stretches the image from a circular area towards the edges of an image.
- Drag the Radius slider to the right to reduce the Circle Splash effect, or to the left to expand it. You can also enter a value from 0% to 100%.
- Move the handle of the effect rope to set the center of the Circle Splash effect. If the effect rope isn’t visible, click the Edit button in the Tool Options pane.
Show Original: Click the Show Original button or press + on your keyboard to see what the image looks like without any effects.
Show Split Comparison: – click the Show Original button, press + on your keyboard, or force click the canvas.
To reset all effects, click Reset at the bottom of the Tool Options pane.
Apply a Displacement Map effect
The Displacement Map effect distorts images based on the dark and light values of a grayscale map. This effect is often used to realistically imitate depth and texture for things like cloth wrinkles, rugged surfaces, etc.
Customize the effect:
Drag and drop the image you’d like to use for the displacement map to the image well in the Tool Options pane, or click Choose to pick an image from your device.
To change how the displacement map fits into your layer, click the Image pop-up menu and choose from Original, Stretch, Scale to Fill, and Scale to Fit.
Move the Scale slider to adjust the size of the image. You can also enter a value from 0% to 400%.
Move the Angle wheel to adjust the rotation of the image. You can also enter a value from 0.0º to 359.9º.
Move the Amount slider to adjust the intensity of the Displacement Map effect. You can also enter a value from 0 px to 200 px.
Move the Smoothness slider to adjust the smoothness of pixel displacement in an image.
Move the handles of the effect rope to adjust the position of the image. If the effect rope isn’t visible, click the effect rope button in the Tool Options pane.
Select "Use grayscale image for map" to automatically convert color images used for the displacement map to grayscale.
To preserve layer transparency when applying the Displacement Map effect, click the effect name in the Tool Options pane and choose Preserve Transparency.
Show Original: Click the Show Original button or press + on your keyboard to see what the image looks like without any effects.
Show Split Comparison: – click the Show Original button, press + on your keyboard, or force click the canvas.
To reset all effects, click Reset at the bottom of the Tool Options pane.
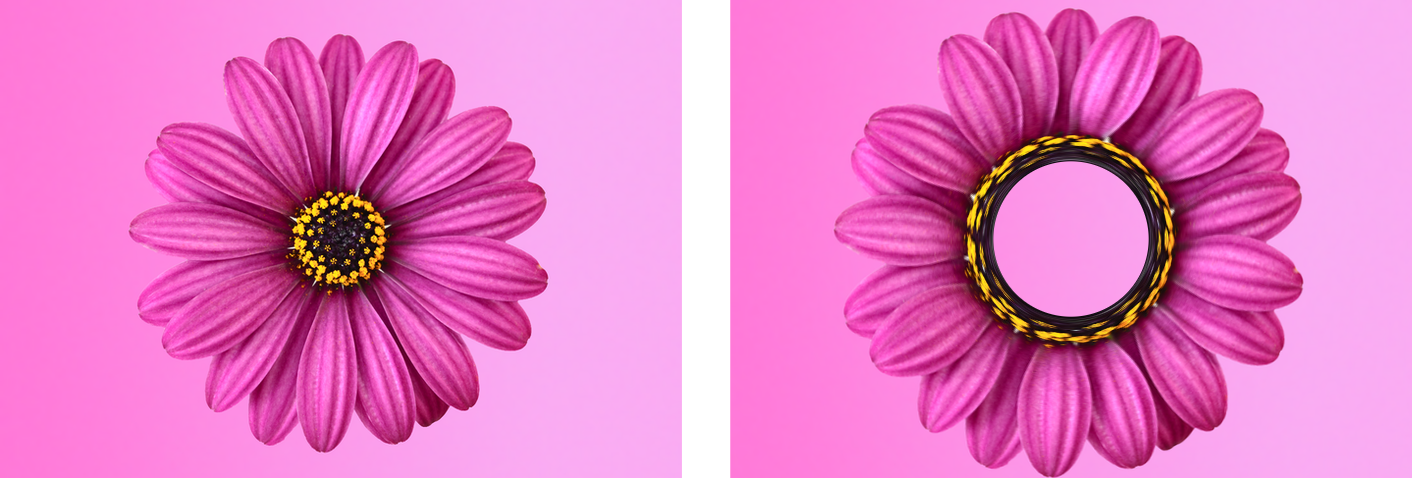
Apply a Hole effect
The Hole effect adds a hole to the image, pushing and distorting any areas near the hole outward.
- Drag the Radius slider to the left to reduce the Hole effect, or to the right to expand it. You can also enter a value from 0% to 100%.
- Move the handle of the effect rope to set the center of the Hole effect. If the effect rope isn’t visible, click the Edit button in the Tool Options pane.
Show Original: Click the Show Original button or press + on your keyboard to see what the image looks like without any effects.
Show Split Comparison: – click the Show Original button, press + on your keyboard, or force click the canvas.
To reset all effects, click Reset at the bottom of the Tool Options pane.
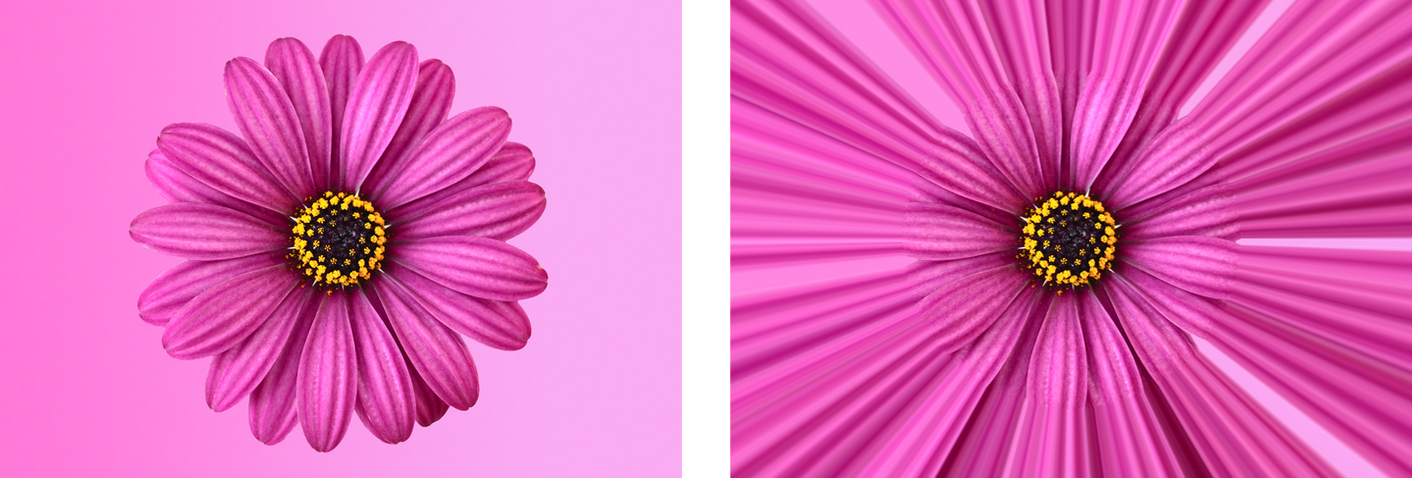
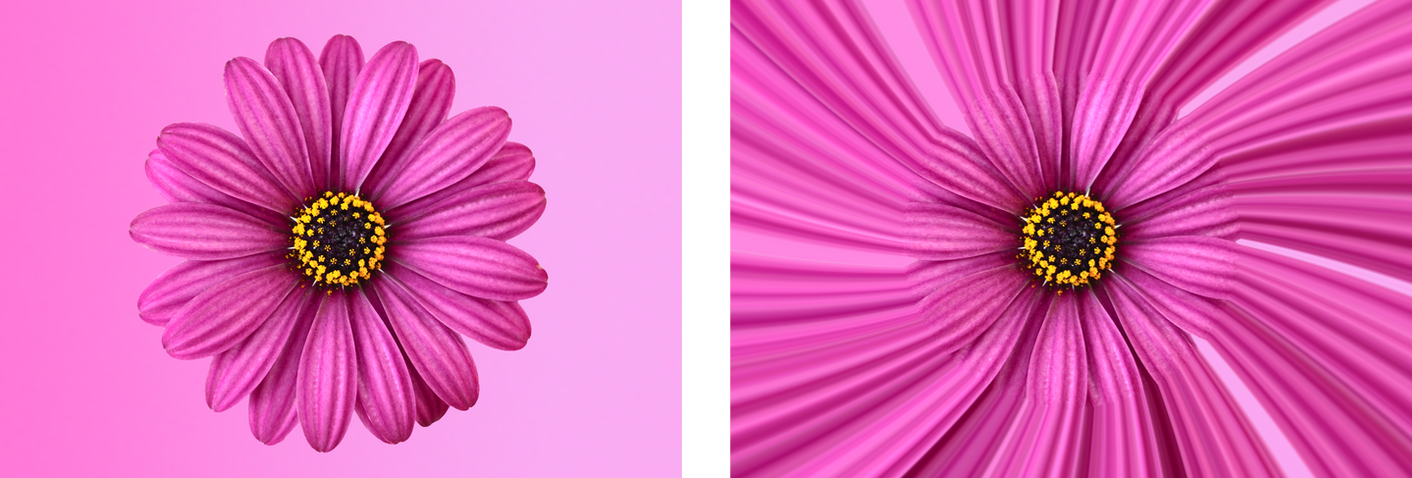
Apply a Light Tunnel effect
The Light Tunnel effect stretches images from a circular area towards the edges of the image and lets you twist the tunnel.
- Customize the effect:
- Drag the Radius slider to the right to reduce the Light Tunnel effect, or to the left to increase it. You can also enter a value from 0% to 100%.
- Move the Rotation wheel to rotate the Light Tunnel effect. You can also enter a value from 0.0º to 359.9º.
- Move the handle of the effect rope to set the center of the Light Tunnel effect. If the effect rope isn’t visible, click the Edit button in the Tool Options pane.
Show Original: Click the Show Original button or press + on your keyboard to see what the image looks like without any effects.
Show Split Comparison: – click the Show Original button, press + on your keyboard, or force click the canvas.
To reset all effects, click Reset at the bottom of the Tool Options pane.
Apply a Vortex effect
The Vortex effect twists images around a central point to simulate a vortex.

- Customize the effect:
- Drag the Radius slider to the right to make the distorted area larger or to the left to make it smaller. You can also enter a value from 0% to 200%.
- Drag the Amount slider to the right to increase the intensity of the vortex, or to the left to decrease it. You can also enter a value from 0.0 px to 1000.0 px
- Move the handle of the effect rope to set the center of the Vortex effect. If the effect rope isn’t visible, click the Edit button in the Tool Options pane.
Show Original: Click the Show Original button or press + on your keyboard to see what the image looks like without any effects.
Show Split Comparison: – click the Show Original button, press + on your keyboard, or force click the canvas.
To reset all effects, click Reset at the bottom of the Tool Options pane.

