Table of Contents
Slice designs into individual images
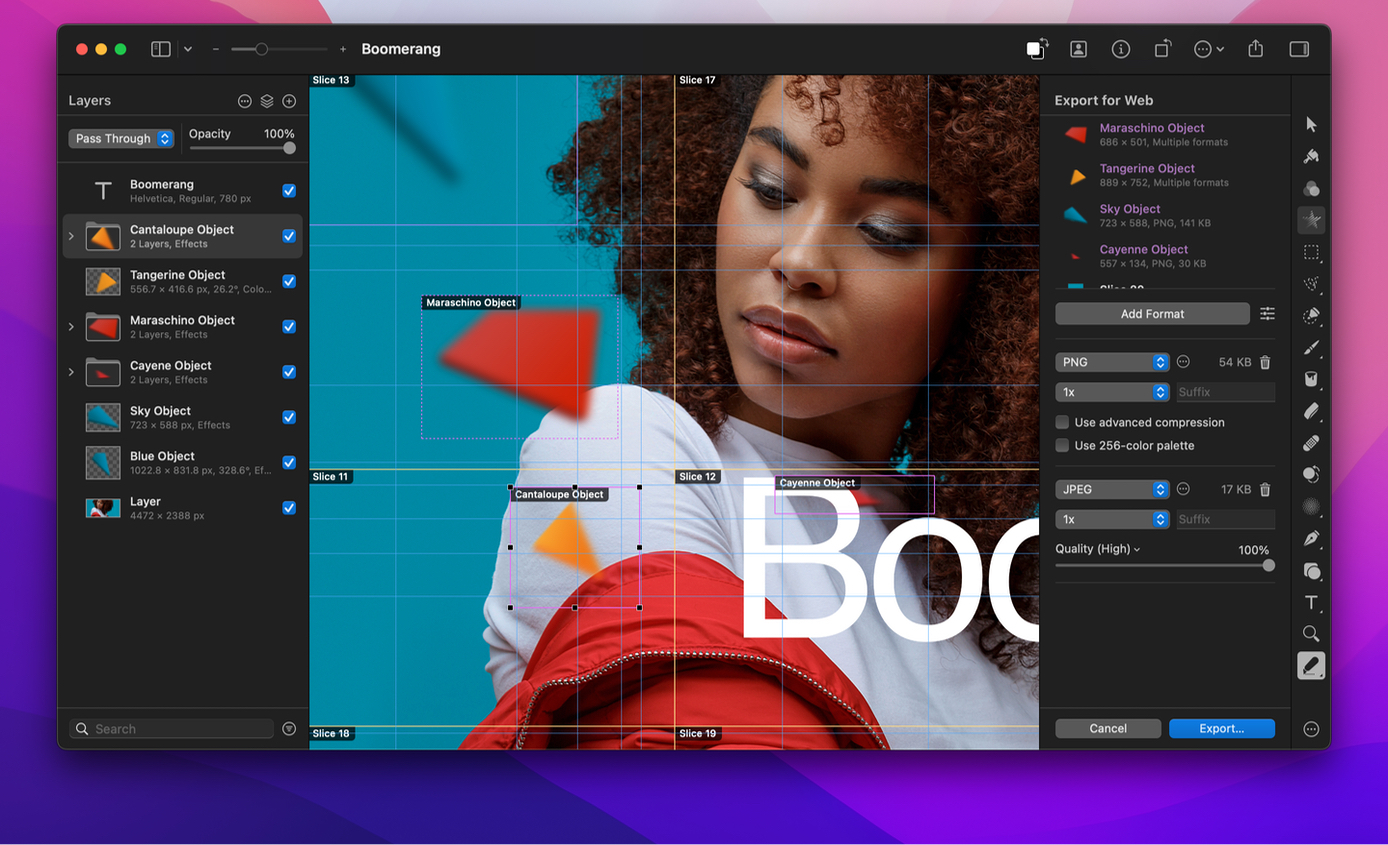
The Slice tool lets you divide designs into individual images, exporting each one separately with its own optimization settings. This is useful when working on web designs or interface designs where you might need to export, for example, buttons in one format and photographic images or logos in another.
In Pixelmator Pro, you can create slices from layers or layer groups in your image or draw them by hand. Each slice is optimized with your chosen settings and has its own optimized preview in your image.
Draw a slice by hand
Choose the Slice tool by doing one of the following:
- Click
 in the Pixelmator Pro
toolbar or select it from the Tools sidebar.
in the Pixelmator Pro
toolbar or select it from the Tools sidebar. - Click
 in the Pixelmator Pro toolbar and choose Export for Web.
 - Choose File > Export for Web (from the File menu at the top of your screen).
- Choose Tools > Export for Web (from the Tools menu at the top of your screen).
- Press or + + on your keyboard.
- Click
Drag over the area of your image you’d like to export.
Create a slice from a layer or layer group
Choose the Slice tool by doing one of the following:
- Click in the Pixelmator Pro
toolbar or select it from the Tools sidebar.
- Click in the Pixelmator Pro toolbar and choose Export for Web.
- Choose File > Export for Web (from the File menu at the top of your screen).
- Choose Tools > Export for Web (from the Tools menu at the top of your screen).
- Press or + + on your keyboard.
- Click
Do any of the following:
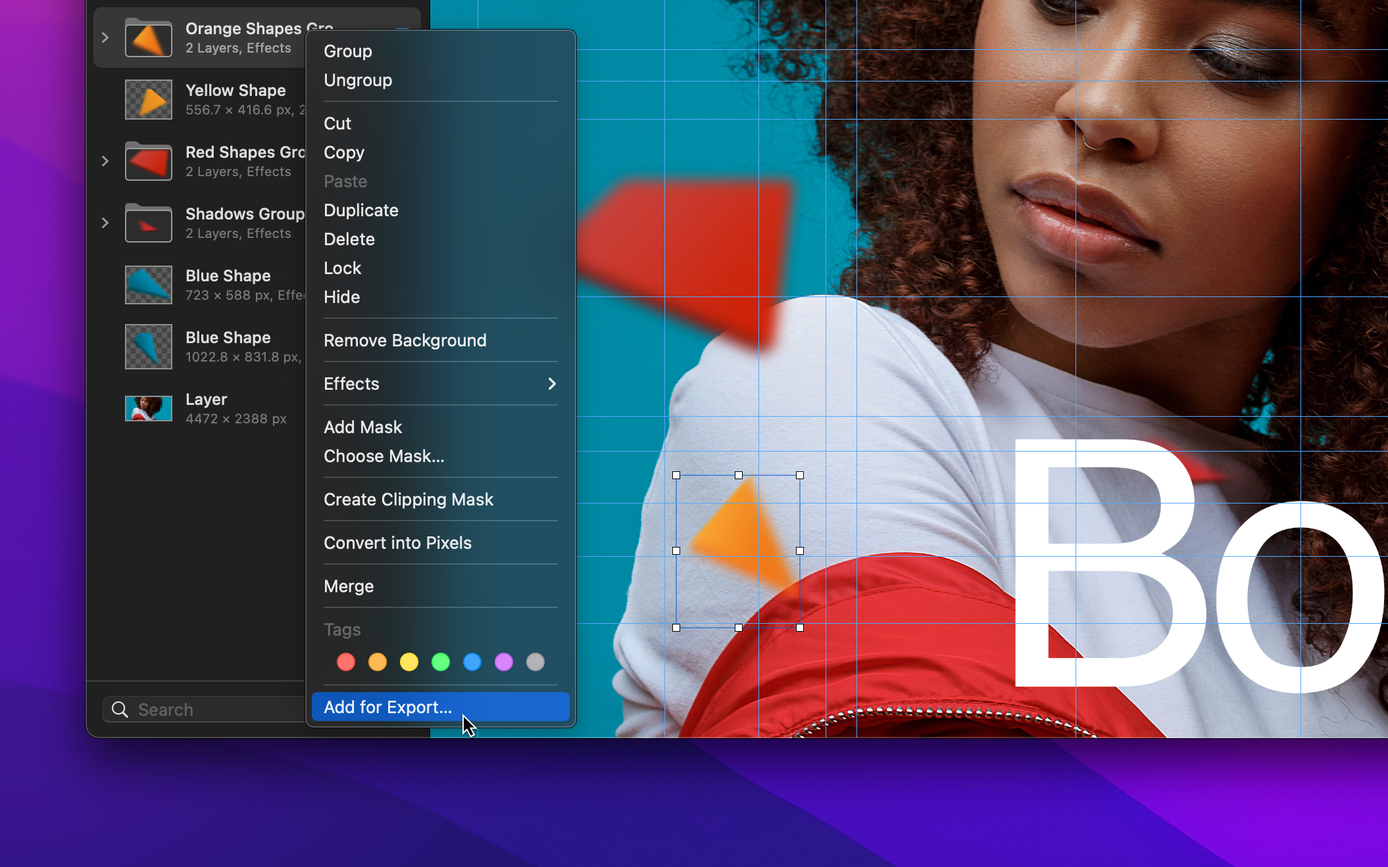
- From the Layers sidebar, drag a layer or layer group and drop it into the list of slices in the Tool Options pane.
- – click a layer or layer group in the Layers sidebar and choose Add for Export.
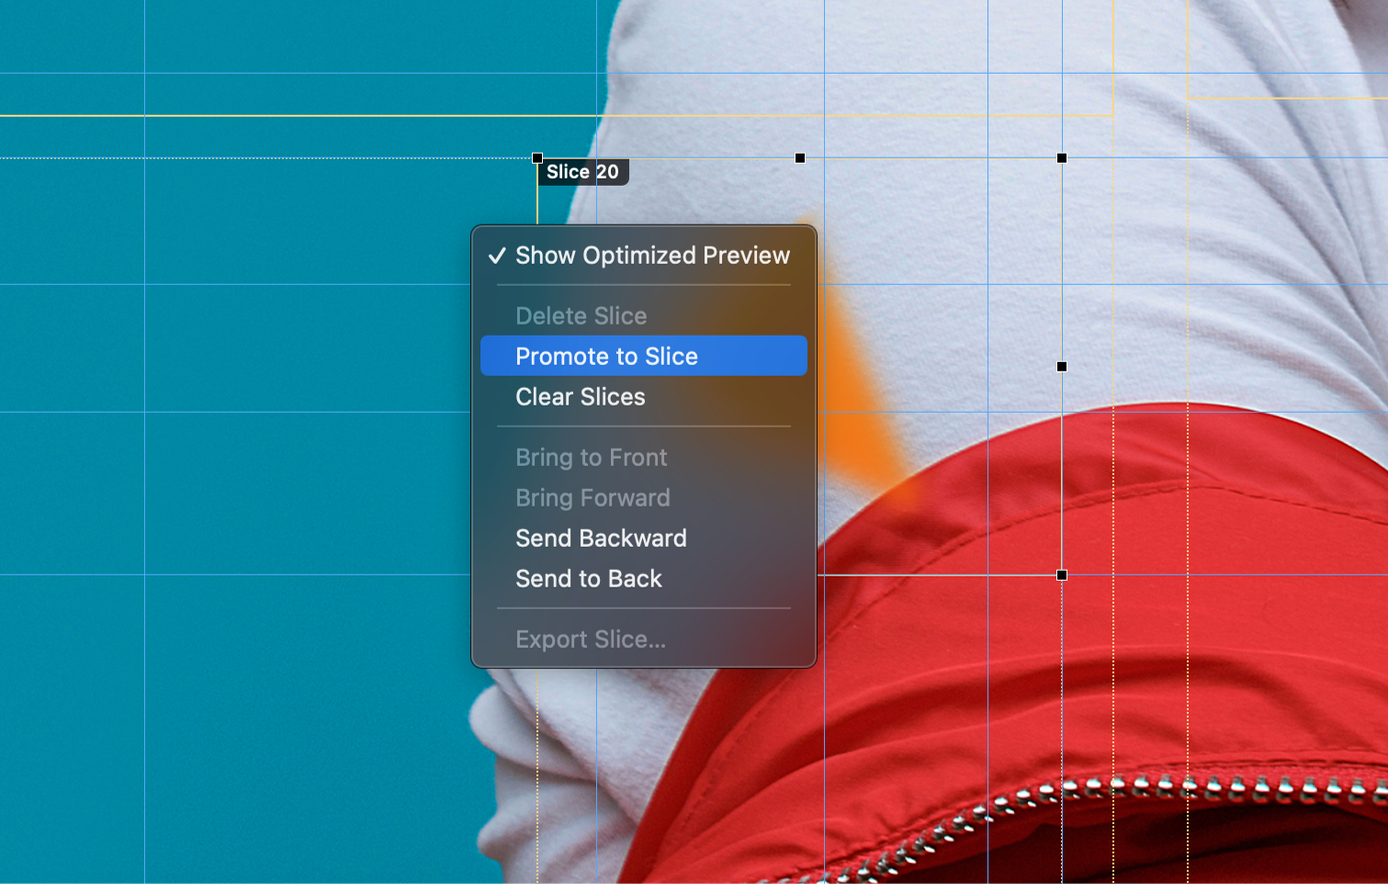
Create a slice from areas remaining between slices
When you create a slice, the areas of the image that fall outside the slice can be promoted to become slices themselves. To create a slice from areas remaining between slices:
With the Slice tool selected, – click an area of the image you’d like to promote to a slice and choose Promote to Slice.
Rename a slice
By default, slices drawn by hand are named Slice 1, Slice 2, Slice 3, and so on, and slices created from layers are named according to the layer name. If you like, you can rename any slice in your image.
- With the Slice tool selected, double-click or force click the name of a slice in the Tool Options pane and enter a new name.
Select one or multiple slices
- With the Slice tool selected, click inside a slice in your image. To select multiple slices, press and hold the key as you click.
Resize a slice
- With the Slice tool selected, drag one of the black layer handles at the edges of the slice.
Move a slice
- Position the Slice tool pointer inside the slice, then drag to move it.
Tip: Press and hold the key after starting to move a slice to move it vertically, horizontally, or diagonally.
Change the stacking order of slices
The stacking order of slices is shown in the Tool Options pane. Their order doesn’t change the exported images, but the optimized preview is shown for the topmost slice. Moving slices to the front also makes it easier to select and move them. If part of a slice is behind another slice, the solid outline changes to a dashed one.
With the Slice tool selected, you can change the stacking order by doing any of the following:
- Select one or more slices and, in the list of slices, drag to rearrange them.
- Select one or more slices, – click the canvas and choose Bring to Front, Bring Forward, Send to Back, or Send Backward.
Change the optimization settings of a slice
- Click to select one or more slices.
Add one or more export formats and customize them.
See Export an image for the web to learn more about optimizing images (including slices) for the web.
Hide or show the optimized preview
When the Slice tool is active, each slice in your image is displayed with its optimization settings so you can see exactly what the exported image will look like. Most of the time, you won’t see much of a difference, but if you drastically reduce the quality or colors of a slice, you may start to see visual changes.
- To hide or show the optimized preview, – click anywhere in your image and select or deselect the Show Optimized Preview option.
Delete a slice
Click to select one or more slices and do one of the following:
- Press the key on your keyboard.
- In the Tool Options pane, – click a selected slice in the list of slices and choose Delete.
- – click a slice in the image and choose Delete Slice.
Delete all slices
- With the Slice tool selected, – click an area of the image and choose Clear Slices.
Export individual slices
- With the Slice tool selected, click to select one or more slices.
- Do any of the following:
- Drag and drop the selected slices onto your Desktop or into a Finder window.
- – click a slice on the canvas, choose Export Slice, choose a location, and click Export.
- – click a slice in the Tool Options pane, choose Export, choose a location, and click Export.
Export all slices
With the Slice tool selected, do one of the following:
- At the bottom of the Tool Options pane, click Export.
- In the Tool Options pane, – click a slice in the list of slices and choose Export All.
Choose a location and click Export.

