DIY LoupeDeck!! Use MIDI Keyboard knobs to control Pixelmator Pro sliders

Talk about Pixelmator Pro, share tips & tricks, tutorials, and other resources.
User avatar

2023-05-26 02:05:59

I really love Pixelmator Pro, and don't regret abandoning the Adobe ship years ago. I edit dozens of photos a day, so using adjustment sliders constantly was getting sub optimal. LoupeDeck+ seemed pretty cool, but at nearly $300 and it's reliance on Adobe products was a deal breaker. I did have an underutilized Arturia Minilab MIDI keyboard with lots of knobs and button pads. Maybe i could.........

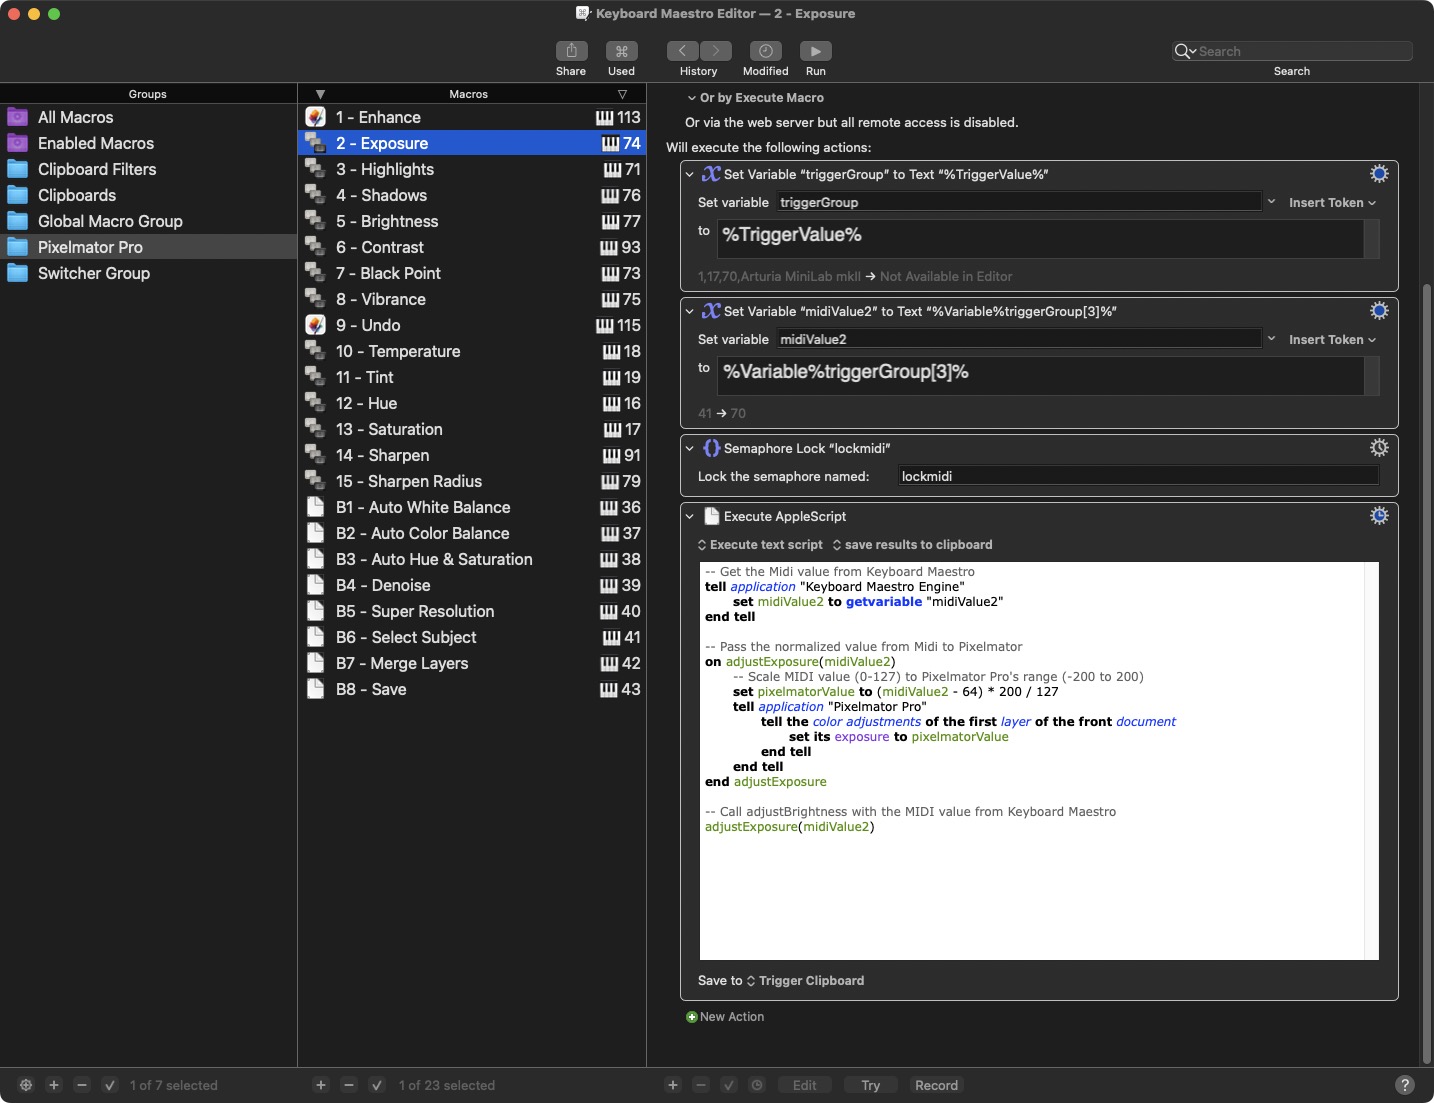
There were not a lot of obvious solutions, but I did notice that Pixelmator Pro has excellent AppleScript support. I also knew of a program called Keyboard Masestro that supported MIDI keyboards and could use those knobs, sliders and button pads as triggers. After a little trial and error, I got it to work! Now I can use the 16 control knobs to handle most of my previously slider dependent tasks. I even used the button pads to handle a few other keyboard and mouse heavy tasks. So, if you want to try it yourself, head over to my Github repo to download the AppleScript and steps to set up Keyboard Maestro. I ended up getting LoupeDeck like functionality for less than a third of the price. Amazon even has some MIDI keyboards that have only knobs and button pads for the musically averse...

https://github.com/tonyknight/MIDI-to-PixelmatorPro

Image
User avatar

2023-06-07 11:35:17

This is pretty awesome. Thanks for sharing!
User avatar

2023-08-04 18:32:34

This is awesome!

I've modified the applescript to use the selected layer instead of the top layer (I work with tons of layers) to speed up my workflow even more. Here's an example:
-- Get the Midi value from Keyboard Maestro
tell application "Keyboard Maestro Engine"
	set midiValue1 to getvariable "midiValue1"
end tell

-- Pass the normalized value from Midi to Pixelmator to change Highlights values
on adjustHighlights(midiValue1)
	-- Scale MIDI value (0-127) to Pixelmator Pro's range (-200 to 200)
	set pixelmatorValue to (midiValue1 - 64) * 200 / 127
	tell application "Pixelmator Pro"
		-- Get the front document
		set frontDoc to the front document
		
		-- Get the active layer
		set activeLayer to the current layer of frontDoc
		
		-- Check if the active layer has color adjustments
		if exists color adjustments of activeLayer then
			-- Adjust the highlights of the existing color adjustments
			tell the color adjustments of activeLayer
				set its highlights to pixelmatorValue
			end tell
		else
			-- Create a new color adjustments layer and adjust the highlights
			tell frontDoc
				set newAdjustmentsLayer to make new layer with properties {name:"Adjustments"}
				tell the color adjustments of newAdjustmentsLayer
					set its highlights to pixelmatorValue
				end tell
			end tell
		end if
	end tell
end adjustHighlights

-- Call adjustHighlights with the MIDI value from Keyboard Maestro
adjustHighlights(midiValue1)