Table of Contents
Working with RAW images
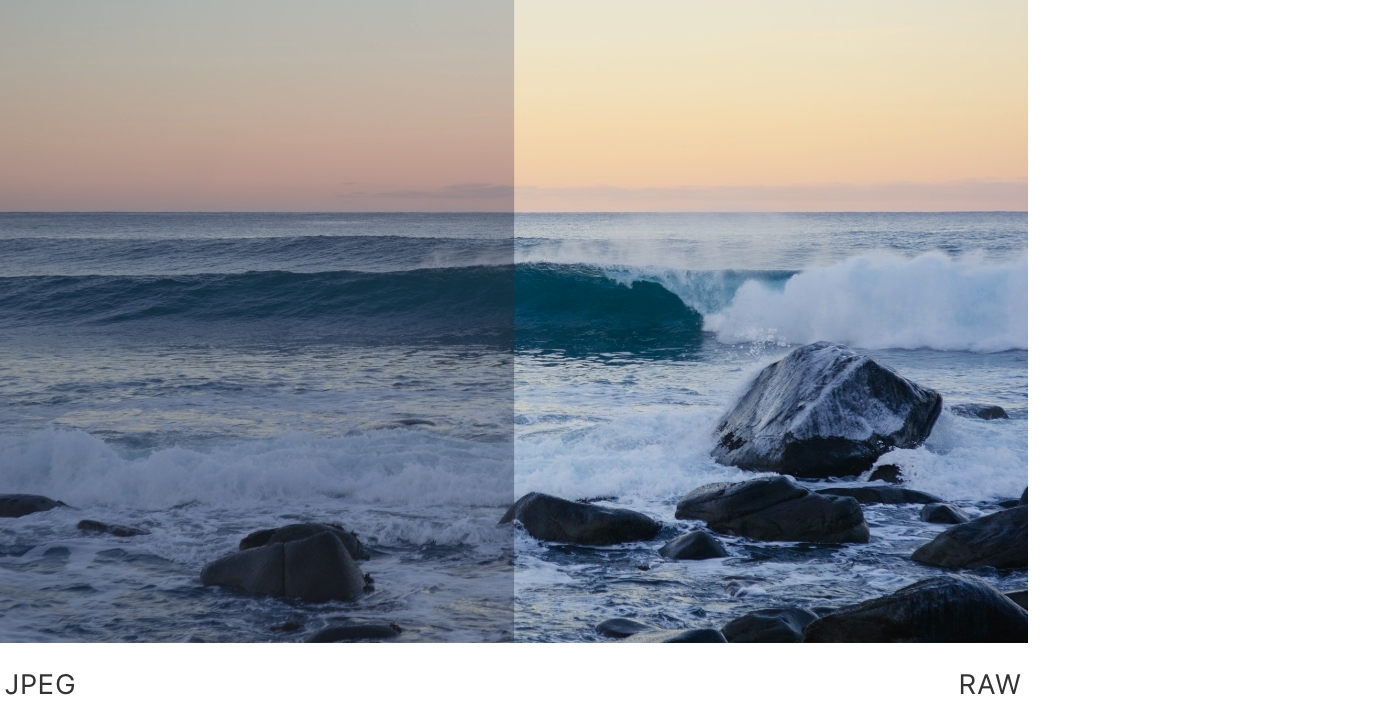
RAW images are a popular format for capturing images with digital cameras. They are sometimes called digital negatives — the files themselves aren’t exactly images yet, but contain a lot of information captured by the camera sensor that has everything needed to create an image. Because of the extended range data, shooting RAW is the best option for getting the most out of your photos.
Pixelmator Pro natively supports RAW files so you can edit your RAW images and take advantage of all the extended detail they contain. There isn’t anything special you need to do when working with RAW images as they are imported as RAW layers and all the extended detail is available when editing with any of the color adjustments. You can even edit multiple RAW layers in a single image — each RAW layer will have a special "R" badge next to it in the Layers sidebar and in the Tool Options pane with the Color Adjustments tool selected.
Note: Pixelmator Pro relies on macOS for RAW support, so the RAW files you can edit in macOS Photos can be edited using Pixelmator Pro. Check the list of supported devices.
Open a RAW image or insert it as a new layer
Open a RAW image from Photos
- Choose File > New from Photos (from the File menu at the top of your screen).
- Locate the RAW image you’d like to open.
- Click Open to open it in the original file format.
Note: If an image you open from Photos no longer contains the RAW data, make sure it hasn't been edited using Photos editing tools or third-party Photos extensions.
Insert a RAW layer from Photos
Do one of the following:
- Click
 at the top of the
Layers sidebar and choose Photos.
at the top of the
Layers sidebar and choose Photos. - Choose Insert > Photos (from the Insert menu at the top of your screen).
- Click
Locate the RAW image you’d like to insert.
- Click Insert to insert it in the original file format.
Note: If an image you open from Photos no longer contains the RAW data, make sure it hasn't been edited using Photos editing tools or third-party Photos extensions.
Turn on the EDR Mode
Pixelmator Pro has a special Extended Dynamic Range Mode you can turn on if you're using a Pro Display XDR, an HDR-compatible Mac model, or other HDR displays that are supported by macOS. This mode lets you utilize a true 10-bit color depth (1.073 billion colors) and P3 wide color gamut when editing images. For example, you can use it to bring out details in the highlights without compressing the dynamic range of the rest of the photo.
In the Tools sidebar, click
![]() and choose EDR Mode from the Customize menu at the bottom of the Color Adjustments pane.
and choose EDR Mode from the Customize menu at the bottom of the Color Adjustments pane.
Note: EDR Mode is available on macOS 10.15 and later when using Pro Display XDR or Mac models that support HDR:
- MacBook Pro from 2018 or later
- MacBook Air from 2018 or later (HDR on external displays requires a model with Apple silicon)
- iMac from 2020 or later
- iMac Pro
- Mac mini from 2018 or later
- Mac Pro from 2019
- Mac Studio
Export the original RAW
Some RAW editing workflows may require exporting the original RAW from Pixelmator Pro. Export RAW reprocesses the RAW image data if needed and lets you export the original RAW image anywhere on your Mac, iCloud, or some external storage drives.
To export the original RAW:
- Select the RAW layer in the Layers sidebar.
- – click the RAW layer and choose Export RAW from the contextual menu.
Reprocess RAW
The Repair, Clone, and Perspective Transform tools in Pixelmator Pro apply changes to the RAW images destructively, i.e. you cannot come back and reset these changes at any point during editing. However, it is possible to reprocess the RAW file to roll back the original RAW image data and revert all destructive edits.
- Select the RAW layer in the Layers sidebar.
- – click the RAW layer and choose Reprocess RAW from the contextual menu.
Apply color adjustments to the specific areas in RAW images
You can apply local adjustments to specific areas of RAW images using color adjustments layers.
- In the Layers sidebar, select the RAW layer you'd like to edit.
- Using any of the selection tools, select the area to which you'd like to apply the color adjustments.
- Press on your keyboard and click Create Layer in the Tool Options pane to create a color adjustments layer.
The areas without adjustments will be automatically masked out for you, only showing adjustments in the areas you have selected.