Table of Contents
Export presets
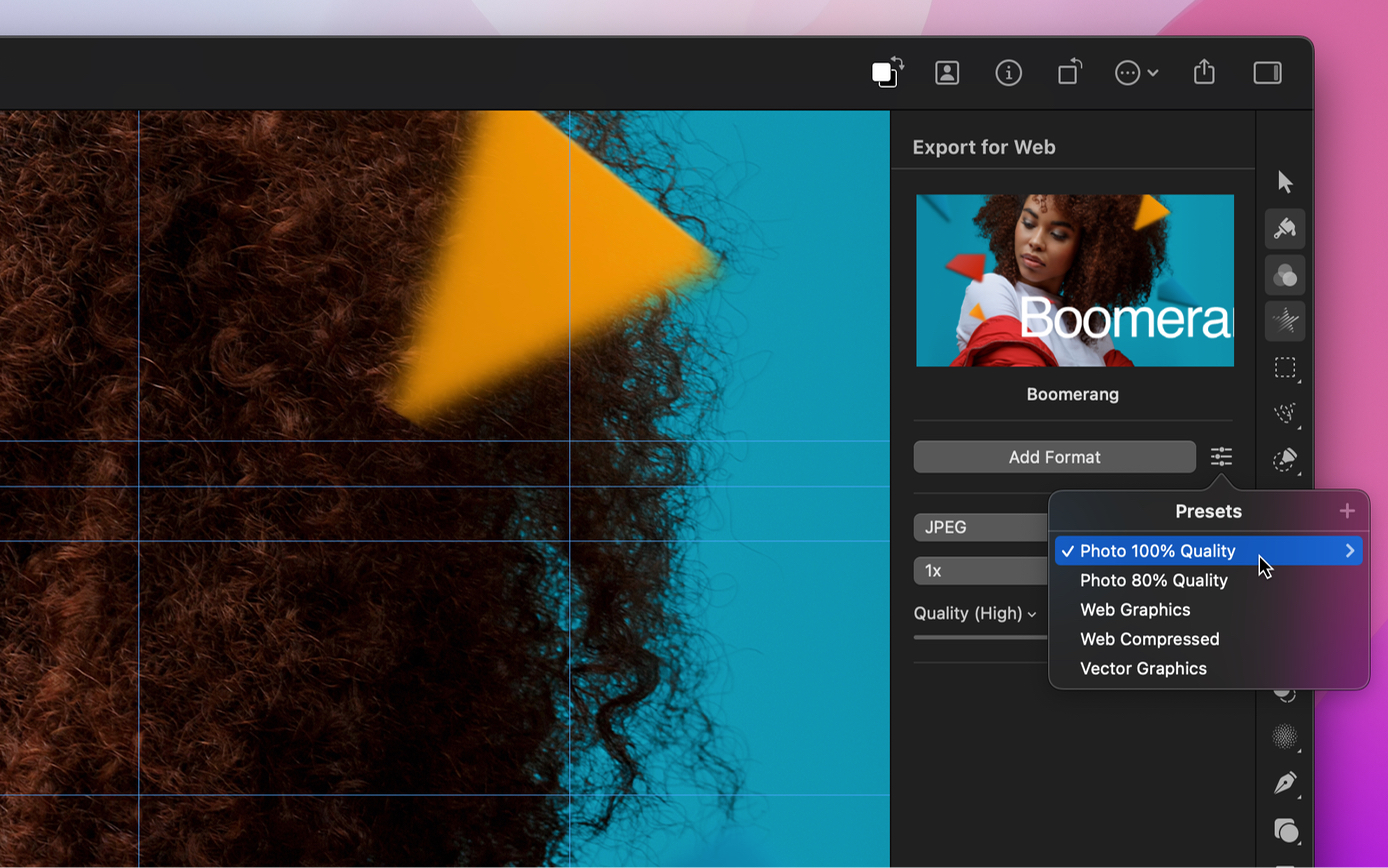
Export presets let you save a combination of export settings and quickly apply them to any image or slice. They also appear in the Share menu as quick export options, so you can export your entire image optimized with your most-used settings at any time.
Apply an export preset to an image
Do one of the following:
- Click
 in the
Tools sidebar.
in the
Tools sidebar. - Choose File > Export for Web (from the File menu at the top of your screen).
- Press the key on your keyboard.
- Click
In the Tool Options pane, click Presets
 and choose from the available presets.
Apply an export preset to a slice
Choose the Slice tool by doing one of the following:
- Click in the
Tools sidebar.
- Choose Image > Slice (from the Image menu at the top of your screen).
- Press the key on your keyboard.
- Click
Draw on the canvas to create a slice or select an existing slice from the list of slices in the Tool Options pane.
Choose any of the available presets.
Save a combination of export settings as a preset
- Do one of the following:
- Click in the
Tools sidebar.
- Choose File > Export for Web (from the File menu at the top of your screen).
- Press the key on your keyboard.
- Click
- Add and customize any number of export formats.
- In the Tool Options pane, click Presets
and click
 .
.
Redefine an export preset
If you’d like to overwrite or update an existing preset with new settings, you can redefine it.
- Do one of the following:
- Click in the
Tools sidebar.
- Choose File > Export for Web (from the File menu at the top of your screen).
- Press the key on your keyboard.
- Click
- Add and customize any number of export formats.
- In the Tool Options pane, click Presets
.
- Open the preset submenu and choose Redefine.
Remove an export preset
If you won't be using a certain export preset anymore, you can remove it from the list of presets.
- Do one of the following:
- Click in the
Tools sidebar.
- Choose File > Export for Web (from the File menu at the top of your screen).
- Press the key on your keyboard.
- Click
- In the Tool Options pane, click Presets
.
- Open the preset submenu and choose Remove.
Rename an export preset
You can rename any preset in your list of presets. This can help better organize the presets or find them easier.
- Do one of the following:
- Click in the
Tools sidebar.
- Choose File > Export for Web (from the File menu at the top of your screen).
- Press the key on your keyboard.
- Click
- In the Tool Options pane, click Presets
.
- Open the preset submenu and choose Rename.
Reset all export presets to default
Resetting all the export presets to default removes any custom presets and returns all the default presets that come with Pixelmator Pro.
- Do one of the following:
- Click in the
Tools sidebar.
- Choose File > Export for Web (from the File menu at the top of your screen).
- Press the key on your keyboard.
- Click
- In the Tool Options pane, click Presets
.
- Open the preset submenu, press and hold the Option key, and choose Reset All.


